Month: July 2024 (Page 1 of 2)

nikon ftn manual

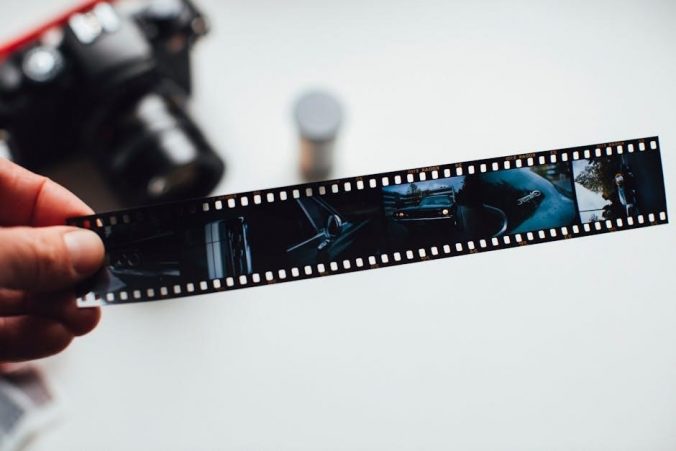
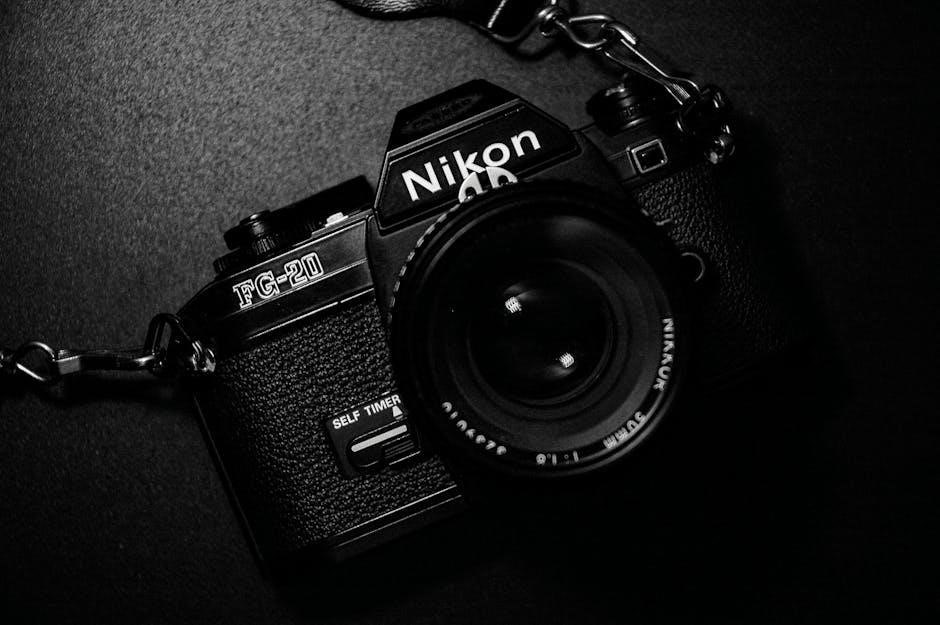
The Nikon Ftn manual provides essential guidance for photographers using this iconic film SLR camera‚ produced from 1967 to 1975. It details operation‚ features‚ and maintenance‚ ensuring optimal use of its manual focus‚ built-in light meter‚ and interchangeable lenses. This comprehensive guide is a must-have for both professionals and enthusiasts seeking to master the Nikon Ftn’s capabilities and preserve its durability.

1.1 Overview of the Nikon Ftn Camera

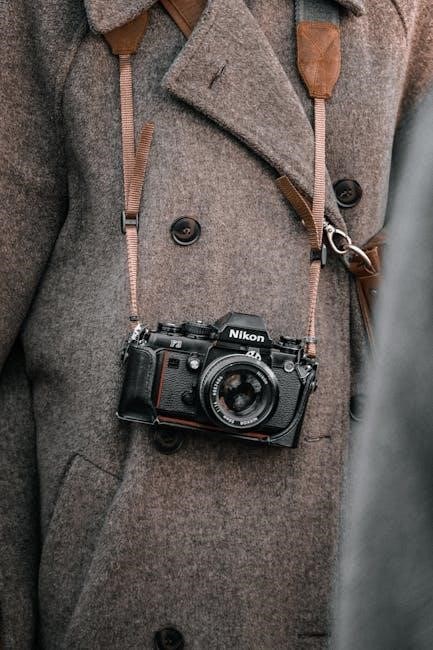
The Nikon Ftn is a 35mm film SLR camera produced from 1967 to 1975‚ known for its robust‚ manual focus design. It features a built-in light meter for exposure control‚ interchangeable lenses‚ and a durable metal body. The camera’s simplicity and reliability make it a favorite among photographers‚ offering precise control over aperture‚ shutter speed‚ and focus. Its compatibility with Nikkor lenses and interchangeable viewfinders adds to its versatility‚ catering to both professionals and enthusiasts alike.

1.2 Importance of the Manual for Photographers

The Nikon Ftn manual is crucial for photographers to fully understand and utilize the camera’s features. It provides detailed instructions on operating the built-in light meter‚ adjusting settings‚ and troubleshooting common issues. The manual also offers maintenance tips to ensure the camera’s longevity. For both new and experienced photographers‚ it serves as an essential guide to mastering the Ftn’s capabilities‚ making it an indispensable resource for optimizing performance and achieving high-quality results in film photography.

Key Features of the Nikon Ftn

The Nikon Ftn features a built-in light meter‚ manual focus‚ and compatibility with various lenses. Its durable construction and interchangeable viewfinders enhance versatility and functionality for photographers.

2.1 Built-in Light Meter and Exposure Control

The Nikon Ftn features a built-in center-weighted CdS exposure meter‚ providing precise light measurement. It couples with the lens aperture and shutter speed controls‚ enabling accurate through-the-lens exposure calculation. This system simplifies achieving optimal exposure settings‚ making it easier for photographers to capture well-balanced images. The meter’s reliability and integration with camera controls enhance the shooting experience‚ ensuring consistent results in various lighting conditions;

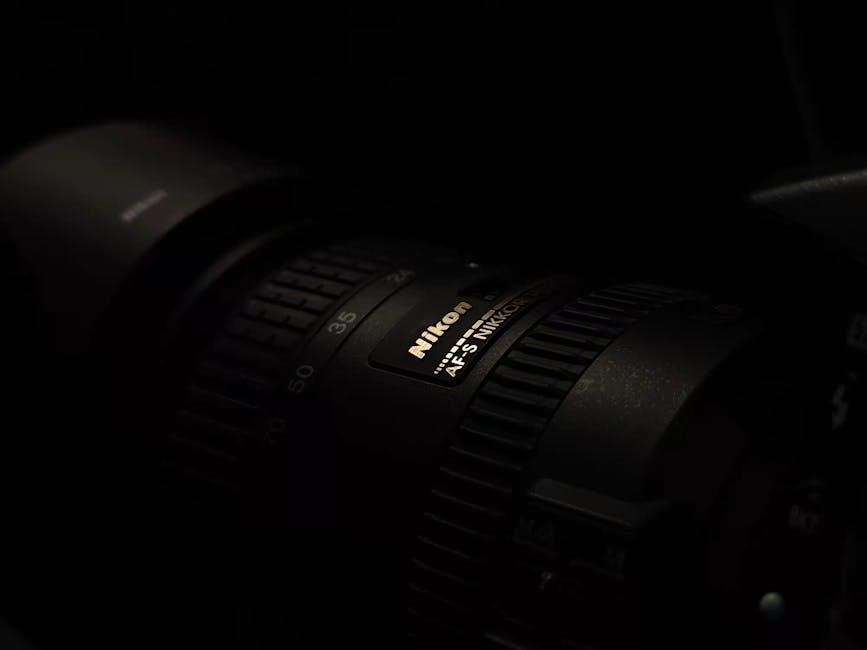
2.2 Manual Focus and Lens Compatibility

The Nikon Ftn offers manual focus functionality‚ allowing precise control over image sharpness. It is compatible with a wide range of Nikon lenses‚ including the popular Nikkor series. The camera’s lens mount supports interchangeable lenses‚ providing flexibility for various photographic needs. This compatibility and manual focus capability make the Ftn a versatile tool for photographers seeking creative control and high-quality imagery across different focal lengths and aperture settings.

2.3 Durable Construction and Design

The Nikon Ftn is renowned for its robust‚ all-metal construction‚ ensuring durability and longevity even with rigorous use. Its mechanical design minimizes reliance on electronics‚ enhancing reliability. The camera’s solid build and precise engineering make it a dependable choice for photographers in various conditions. This sturdy design‚ combined with its timeless mechanics‚ has made the Ftn a favorite among professionals and enthusiasts seeking a reliable film SLR camera for both everyday and challenging environments.

Nikon Photomic Ftn Finder

The Nikon Photomic FTN Finder is an interchangeable viewfinder designed for the Nikon F series‚ featuring a center-weighted CdS exposure meter for precise light measurement and accurate exposures.

3.1 Features of the Photomic Ftn Finder

The Photomic FTN Finder offers a center-weighted CdS exposure meter‚ coupling with lens aperture and shutter speed for precise through-the-lens light measurement. Its interchangeable design enhances versatility‚ allowing photographers to adapt to various shooting scenarios. With clear viewing and accurate metering‚ it simplifies achieving optimal exposures‚ making it an essential accessory for Nikon F users seeking professional-grade functionality and reliability in film photography applications.

3.2 How the Center-Weighted CdS Exposure Meter Works

The center-weighted CdS exposure meter in the Photomic FTN Finder operates by measuring light through the lens‚ ensuring accurate exposure readings. It uses a voltage divider circuit that centers the meter movement at 12 o’clock‚ providing precise control. The meter couples with the camera’s aperture and shutter speed controls‚ allowing seamless integration. This design enables photographers to achieve consistent and accurate exposures‚ making it a reliable tool for film photography enthusiasts and professionals alike.

Operating the Nikon Ftn

Mastering the Nikon Ftn involves loading film‚ adjusting aperture‚ shutter speed‚ and focus. Proper handling ensures precise control‚ delivering exceptional results in film photography.

4.1 Loading Film and Basic Camera Handling

Loading film into the Nikon Ftn requires careful attention to ensure proper alignment and functioning. Open the camera back‚ align the film with the guide rails‚ and secure it to the take-up spool. Advance the film using the winding lever until the first frame is correctly positioned. Set the film speed (ASA) using the dedicated dial to match your film type. Always avoid exposing the film to direct light during loading. Once loaded‚ close the back firmly and wind the film to prepare for shooting. Proper handling ensures smooth operation and optimal image quality.

4.2 Adjusting Aperture‚ Shutter Speed‚ and Focus

Adjusting aperture‚ shutter speed‚ and focus on the Nikon Ftn is straightforward. The aperture is controlled via a ring on the lens‚ offering f/stops from f/1.4 to f/16. Shutter speed is set using a dial on the camera’s top plate‚ with speeds ranging from 1 second to 1/1000th of a second‚ plus a B setting. Focus is manual‚ achieved by turning the lens barrel until the subject is sharp. Use the built-in light meter to ensure proper exposure by aligning the needle with the center mark. This manual control allows for precise creativity and technical accuracy in photography.

Maintenance and Repair

Regular cleaning and calibration of the Nikon Ftn’s light meter ensure accurate exposures. Refer to the repair manual for technical issues and maintenance schedules to preserve functionality and longevity.

5.1 Cleaning and Upkeep Tips

Regular maintenance is crucial for the Nikon Ftn’s longevity. Use a soft cloth and mild cleaning solutions to wipe down the camera body‚ ensuring no harsh chemicals damage the finish. The viewfinder and mirrors should be cleaned with specialized optics tissues to prevent scratches. Lubricate mechanical components sparingly and avoid extreme temperatures to maintain performance. Proper storage in a dry‚ cool environment will also help preserve the camera’s condition.

5.2 Light Meter Calibration and Maintenance

Calibrating the Nikon Ftn’s light meter ensures accurate exposures. Refer to the manual for precise adjustment procedures using a voltage divider circuit in test or meter modes. Clean the CdS cell gently with a dry cotton swab to avoid damage. Regular checks and adjustments maintain meter accuracy. Proper maintenance guarantees reliable light meter performance‚ essential for optimal photography results with this classic camera.

5.3 Repair Manual and Service Options

For complex repairs‚ the Nikon Ftn repair manual provides detailed instructions‚ covering mechanical and optical adjustments. Authorized service centers or experienced technicians are recommended for professional servicing. Additionally‚ online resources like Mike Butkus’ library offer repair guides and part lists‚ ensuring continued functionality of this vintage camera. Regular maintenance and timely repairs extend the life of the Nikon Ftn‚ preserving its performance for future use in film photography.

Accessories for the Nikon Ftn

The Nikon Ftn supports various accessories‚ including interchangeable viewfinders like the Photomic FTN finder‚ enhancing functionality. Compatible lenses and adapters expand its versatility for photographers.

6.1 Interchangeable Viewfinders

The Nikon Ftn offers five interchangeable viewfinders: Eye-Level‚ Waist-Level‚ 6X Magnifying‚ Action‚ and Photomic FTN. Each provides unique benefits‚ such as easier composition or precise focusing. The Photomic FTN finder features a built-in CdS exposure meter‚ simplifying accurate light measurement. These viewfinders enhance usability‚ catering to different shooting styles and preferences‚ making the Ftn versatile for various photographic needs and environments.

6.2 Compatible Lenses and Adapters

The Nikon Ftn is compatible with a wide range of Nikkor lenses‚ offering flexibility for diverse photography needs. Adapters enable the use of non-Nikon lenses‚ though original Nikon adapters are recommended for optimal performance. The F-mount system ensures compatibility with numerous focal lengths‚ from wide-angle to telephoto lenses. This versatility makes the Ftn adaptable for various shooting scenarios‚ maintaining its reputation as a reliable and versatile film SLR camera.

Historical Context of the Nikon Ftn

The Nikon Ftn‚ produced from 1967 to 1975‚ is a historic film SLR camera known for its durability and innovative features‚ significantly impacting film photography’s evolution.

7.1 Production Timeline and Popularity

The Nikon Ftn was produced from 1967 to 1975‚ becoming a popular choice among professional photographers and enthusiasts. Its durability‚ manual controls‚ and compatibility with Nikkor lenses made it a favorite‚ ensuring its lasting impact on film photography. The camera’s robust design and precise engineering contributed to its widespread use‚ solidifying its place in photographic history.

7.2 Impact on Film Photography

The Nikon Ftn significantly influenced film photography‚ offering precise manual controls and a built-in light meter‚ which empowered photographers to achieve accurate exposures. Its interchangeable lenses and durable construction made it a reliable tool for professionals and enthusiasts alike. The Ftn’s impact was evident in its popularity during its production years‚ as it became a go-to camera for capturing high-quality images‚ leaving a lasting legacy in the world of film photography.

Troubleshooting Common Issues

This section addresses resolving issues like light meter inaccuracies‚ shutter malfunctions‚ and aperture problems. Regular maintenance and calibration are key to optimal camera performance.

8.1 Solving Light Meter Inaccuracies

The Nikon Ftn’s light meter may occasionally show inaccuracies due to improper calibration or mechanical issues. Start by cleaning the meter contacts and ensuring proper lens coupling. If issues persist‚ adjust the meter calibration or consult a professional for servicing. Regular maintenance‚ such as checking the battery and shutter speed‚ can prevent such problems. Accurate exposure measurement is crucial for optimal results‚ so addressing these issues promptly ensures reliable performance.

8.2 Addressing Shutter and Aperture Problems

Shutter and aperture issues in the Nikon Ftn often stem from mechanical wear or dirt accumulation. Clean the shutter blades and aperture mechanism gently with a soft brush or lint-free cloth. Ensure proper lubrication and check for obstructions. If problems persist‚ consult the repair manual or seek professional servicing to avoid further damage. Regular maintenance is key to maintaining precise control over exposure settings and ensuring smooth camera operation. Always handle these components with care to prevent mechanical failure.

Downloading the Nikon Ftn Manual

The Nikon Ftn manual is widely available online in PDF format‚ accessible through trusted sources like orphancameras.com and Nikon’s official website. Photographers can easily download it for free‚ ensuring they have comprehensive guidance for optimal camera use and troubleshooting.

9.1 Availability of PDF Manuals Online

Nikon Ftn manuals are readily available online as PDFs‚ accessible through various trusted sources like Orphan Cameras and Nikon’s official website. These PDFs provide detailed instructions‚ from camera operation to maintenance‚ ensuring photographers can easily access the information they need. Websites like Mike Butkus’s library offer free downloads‚ making it convenient for users to find and utilize these resources for optimal camera functionality and troubleshooting.

9.2 Reliable Sources for Download

Reliable sources for downloading the Nikon Ftn manual include Orphan Cameras and Mike Butkus’s library‚ both offering free‚ high-quality PDF versions. These websites are trusted within the photography community for providing authentic and comprehensive manuals. Users can also visit Nikon’s official website or authorized distributors for verified downloads. Ensure to access manuals from reputable sites to avoid misinformation and maintain the integrity of your camera’s operation and maintenance.

The Nikon Ftn manual is indispensable for mastering this iconic camera’s features and maintenance. Its detailed guidance ensures optimal performance‚ appealing to both professionals and enthusiasts alike.

10.1 Final Thoughts on the Nikon Ftn Manual

The Nikon Ftn manual is a vital resource for photographers‚ offering exhaustive instructions on camera operation‚ maintenance‚ and troubleshooting. Its detailed insights ensure users can maximize the camera’s potential‚ making it an essential tool for both professionals and enthusiasts. The manual’s clarity and depth have solidified its reputation as an invaluable companion for anyone seeking to master this iconic film SLR camera.

10.2 Encouragement for Further Exploration

Exploring the Nikon Ftn manual opens doors to mastering a legendary film SLR camera. With its detailed guidance on operation‚ maintenance‚ and troubleshooting‚ photographers can unlock the camera’s full potential. Encouraging further exploration‚ users are invited to delve into the world of interchangeable lenses‚ manual controls‚ and historical significance. Resources like Mike Butkus’s manuals and repair guides provide additional support. Embrace the joy of film photography and continue discovering the enduring charm of the Nikon Ftn.

hidden figures complete movie guide

The film Hidden Figures tells the true story of African-American women who played crucial roles at NASA during the 1960s. It highlights their struggles‚ achievements‚ and the societal challenges they overcame. Viewing guides and educational resources are available for deeper understanding.

Hidden Figures is a powerful and inspiring film based on the true story of three African-American women who played pivotal roles in NASA’s early space programs. The movie follows the lives of Katherine Johnson‚ Dorothy Vaughan‚ and Mary Jackson‚ who‚ despite facing racial and gender barriers‚ broke stereotypes and achieved extraordinary success. Set in the 1960s during the height of the Space Race‚ the film explores their contributions to historic milestones‚ such as the Mercury missions. With standout performances by Taraji P. Henson‚ Octavia Spencer‚ and Janelle Monáe‚ Hidden Figures highlights the women’s intelligence‚ determination‚ and resilience in overcoming societal obstacles. The film not only celebrates their achievements but also sheds light on the untold stories of women who helped shape America’s space exploration. Directed by Theodore Melfi and adapted from Margot Lee Shetterly’s book‚ the movie has received widespread acclaim for its uplifting message and historical significance.

Historical Context of the Film

Hidden Figures is set against the backdrop of the 1960s‚ a transformative period in American history marked by the Civil Rights Movement and the Space Race. The film captures the societal norms of the time‚ including racial segregation and gender discrimination‚ which the characters actively challenge. The story unfolds at NASA’s Langley Research Center in Virginia‚ where African-American women‚ despite their brilliance‚ were relegated to segregated facilities and roles. The film highlights the tension between the advancements in space exploration and the regressive social attitudes of the era. By depicting the struggles of Katherine Johnson‚ Dorothy Vaughan‚ and Mary Jackson‚ the movie sheds light on the overlooked contributions of African-American women to NASA’s success. The historical context underscores the broader fight for equality and the pivotal role these women played in breaking down barriers. The film’s release in 2016 also coincided with a renewed national conversation about race and gender‚ making its message particularly resonant.

Key Characters and Their Roles

The film Hidden Figures revolves around three African-American women who played pivotal roles at NASA during the 1960s. Katherine Johnson (played by Taraji P. Henson) is a brilliant mathematician whose calculations were instrumental in the success of NASA’s space missions. Dorothy Vaughan (played by Octavia Spencer) was a supervisor who led the African-American female mathematicians and later became an expert in computer programming. Mary Jackson (played by Janelle Monáe) was an aspiring engineer who broke barriers by becoming NASA’s first African-American female engineer. Their roles highlight the challenges they faced due to racial and gender discrimination‚ as well as their determination to excel in their fields. The characters’ contributions were essential to NASA’s achievements‚ including the successful launch of astronaut John Glenn into orbit. Their stories showcase resilience‚ innovation‚ and the fight for equality in a historically male-dominated industry. The actresses’ performances bring depth and authenticity to these inspiring real-life figures.

The True Story Behind the Film

Hidden Figures is based on the true story of three African-American women who made significant contributions to NASA’s space program during the 1960s. Katherine Johnson‚ Dorothy Vaughan‚ and Mary Jackson were mathematicians and engineers who broke racial and gender barriers. Johnson’s exceptional math skills were crucial for astronaut John Glenn’s orbit around Earth‚ while Vaughan led a team of “human computers” and later became a programmer. Jackson overcame segregation to become NASA’s first African-American female engineer. The film captures their struggles with discrimination and their determination to succeed. The story‚ adapted from Margot Lee Shetterly’s book‚ reveals how these women’s achievements were often overlooked until recent years. Their legacy inspires future generations to pursue STEM careers. The film stays true to their real-life experiences‚ emphasizing their resilience and the societal challenges they faced. Their contributions were pivotal in NASA’s success during the Space Race‚ proving that talent and hard work can overcome adversity.

Educational Resources and Viewing Guides

Educational resources and viewing guides for Hidden Figures are widely available‚ offering a deeper understanding of the film and its themes. These resources are designed for students and educators to explore the movie’s historical context‚ characters‚ and messages. A 60-page viewing guide helps improve English language skills through vocabulary‚ listening comprehension‚ and discussion questions. It includes questions about key characters like Katherine Johnson‚ Dorothy Vaughan‚ and Mary Jackson‚ as well as plot points such as Katherine’s assignment to the Space Task Group and Mary’s journey to becoming an engineer. Additional guides provide guided notes for movie watching‚ comparing facts and fiction‚ and exploring the challenges faced by the women. These resources align with STEM education‚ highlighting the importance of math‚ science‚ and perseverance. They also emphasize the film’s themes of diversity‚ inclusion‚ and overcoming adversity. Teachers and students can use these materials to foster meaningful discussions and inspire future generations. The guides are versatile‚ suitable for both educational and inspirational purposes.

Themes and Messages in the Movie

The movie Hidden Figures explores powerful themes of perseverance‚ equality‚ and the triumph of the human spirit. It highlights the struggles faced by African-American women in a racially segregated and male-dominated workplace‚ showcasing their resilience and determination. A central theme is the fight against discrimination‚ as the characters challenge societal norms and break barriers. The film also emphasizes the importance of education and intellectual talent‚ demonstrating how math and science can empower individuals to achieve greatness. Themes of sisterhood and camaraderie are prominent‚ as the women support each other through personal and professional challenges. Additionally‚ the movie celebrates the untold contributions of marginalized individuals in history‚ bringing their stories to light. It inspires audiences to pursue their passions‚ regardless of obstacles‚ and underscores the value of diversity and inclusion. These themes resonate deeply‚ making the film not only entertaining but also educational and motivational. The movie’s messages of hope and equality continue to inspire audiences worldwide.

The Impact of Hidden Figures on Pop Culture

The release of Hidden Figures in 2016 had a profound impact on pop culture‚ sparking widespread conversations about diversity‚ representation‚ and the untold stories of African-American women in STEM. The film’s success challenged Hollywood’s historical exclusion of such narratives‚ paving the way for more inclusive storytelling. It inspired countless discussions on social media‚ with hashtags like #HiddenFigures trending globally‚ celebrating the achievements of Katherine Johnson‚ Dorothy Vaughan‚ and Mary Jackson. The movie also influenced educational initiatives‚ with schools incorporating its story into curricula to highlight the contributions of women and minorities in science and history. Merchandise‚ from soundtracks to books‚ further amplified its reach‚ making it a cultural phenomenon. The film’s success proved that stories about diverse heroes resonate universally‚ shifting perceptions of NASA’s history and inspiring future generations to pursue careers in math and science. Its impact continues to be felt‚ as it remains a symbol of empowerment and a reminder of the importance of representation in media.

Box Office Success and Awards

Hidden Figures achieved significant box office success‚ grossing over $236 million worldwide‚ making it one of the highest-grossing films of 2016. Its wide release in January 2017 saw it top the U.S. box office‚ earning $20.5 million over the Martin Luther King Jr. holiday weekend. The film received widespread critical acclaim‚ leading to numerous award nominations and wins. It was nominated for three Academy Awards‚ including Best Picture and Best Supporting Actress for Octavia Spencer. Additionally‚ it earned two Golden Globe nominations‚ further solidifying its impact. The film’s success was not only financial but also cultural‚ as it brought attention to the untold stories of African-American women in STEM. Its awards and box office performance highlighted its universal appeal and the importance of its inspiring message. The film’s success also spurred educational initiatives and discussions‚ cementing its legacy as a landmark cinematic achievement.

Production and Behind-the-Scenes Insights

The production of Hidden Figures was led by director Theodore Melfi‚ who brought Margot Lee Shetterly’s book to life. The screenplay was adapted by Melfi and Allison Schroeder‚ focusing on the inspiring true stories of Katherine Johnson‚ Dorothy Vaughan‚ and Mary Jackson. Filming took place in Georgia and Virginia‚ capturing the authentic 1960s setting. The cast‚ including Taraji P. Henson‚ Octavia Spencer‚ and Janelle Monáe‚ underwent extensive preparation to portray their characters accurately. Allison Janney and Kevin Costner also starred in key roles‚ adding depth to the narrative. The film’s score‚ composed by Hans Zimmer and Pharrell Williams‚ blended genres to reflect the era’s cultural and emotional landscape. Behind-the-scenes‚ the production team emphasized historical accuracy‚ from costumes to set designs‚ to honor the women’s legacies. Challenges included balancing drama with inspiration while staying true to the real-life events. The film’s success was a testament to the dedication of its creators and cast in telling this untold story.

The Book Hidden Figures by Margot Lee Shetterly

Hidden Figures‚ written by Margot Lee Shetterly‚ is a non-fiction book that uncovers the untold stories of African-American women who played pivotal roles in NASA’s early years. Published in 2016‚ the book focuses on Katherine Johnson‚ Dorothy Vaughan‚ and Mary Jackson‚ detailing their contributions as mathematicians and engineers during the Space Race. Shetterly‚ a Virginia native‚ grew up near NASA’s Langley Research Center and was inspired by the women’s achievements. The book is divided into three parts‚ exploring their early lives‚ careers‚ and the challenges they faced due to racial and gender barriers. It also highlights their resilience and determination in breaking down societal norms. The book became a New York Times bestseller and received critical acclaim for shedding light on these forgotten heroes. Its success led to the film adaptation‚ further amplifying their stories. Shetterly’s work has been praised for its meticulous research and its ability to blend history with personal narratives‚ making it a vital resource for understanding the contributions of these trailblazing women.

Lesson Plans and Discussion Questions

Educators can utilize comprehensive lesson plans and discussion questions to engage students with the film Hidden Figures. These resources focus on the true story of Katherine Johnson‚ Dorothy Vaughan‚ and Mary Jackson‚ highlighting their roles at NASA and the challenges they faced. Many guides include questions about key characters‚ plot points‚ and historical context‚ helping students analyze the film’s themes and messages. Some resources also provide comparisons between the film and real-life events‚ encouraging critical thinking. For example‚ questions about Katherine’s mathematical abilities‚ Mary’s engineering aspirations‚ and Dorothy’s leadership can deepen understanding of their contributions. Additionally‚ discussion prompts explore broader topics like racism‚ gender inequality‚ and perseverance. These materials are designed for various grade levels and can be integrated into subjects such as history‚ science‚ and English. They often include vocabulary exercises‚ comprehension checks‚ and reflective writing assignments. By using these tools‚ educators can help students connect the film’s inspiring story to broader lessons about determination‚ equality‚ and STEM careers. These resources make the film a powerful teaching tool for fostering engagement and learning.

Comparing the Film to Real-Life Events

The film Hidden Figures is based on the true story of three African-American women who worked at NASA during the 1960s. While the movie captures the essence of their contributions‚ some creative liberties were taken to enhance storytelling. For instance‚ Katherine Johnson’s role in the Space Task Group was pivotal‚ but the film dramatizes her solitude in the group. In reality‚ she worked alongside other mathematicians‚ though she was still the only African-American woman in her section. Similarly‚ Mary Jackson’s journey to becoming an engineer is portrayed accurately‚ though the timeline was condensed for cinematic effect. Dorothy Vaughan’s leadership of the “West Computers” is also well-depicted‚ though her transition to supervising the group was more gradual in real life. The film accurately reflects the racial and gender barriers the women faced‚ such as segregated facilities and limited career opportunities. However‚ some events‚ like Katherine’s direct involvement in the Apollo 11 mission‚ were exaggerated for dramatic impact. Overall‚ the film stays true to the spirit of their achievements while simplifying certain details for narrative clarity. These comparisons highlight the balance between fact and fiction in portraying their inspiring stories.

Legacy and Cultural Significance

Hidden Figures has left an indelible mark on popular culture and historical awareness. By shedding light on the untold stories of African-American women in STEM during the Space Race‚ the film sparked widespread recognition of their contributions. It challenged stereotypes and inspired a new generation of women and minorities to pursue careers in science‚ technology‚ engineering‚ and mathematics (STEM). The movie also prompted a broader conversation about the importance of diversity and inclusion in achieving greatness. Its success led to the creation of educational resources‚ such as viewing guides and lesson plans‚ to further educate audiences about these trailblazers. The film’s cultural significance lies in its ability to bridge the gap between history and modern-day aspirations‚ proving that stories of resilience and determination can resonate universally. By celebrating the achievements of Katherine Johnson‚ Dorothy Vaughan‚ and Mary Jackson‚ Hidden Figures has become a powerful symbol of overcoming adversity and breaking barriers. Its legacy continues to inspire and educate‚ ensuring these women’s contributions are never forgotten.

loeffler randall size guide

Discover your perfect fit with Loeffler Randall’s detailed size guide. The chart offers precise measurements for women’s and men’s footwear, ensuring comfort and style. Recent additions include expanded sizes, such as U.S. 12 (EU 44), catering to diverse needs.

Loeffler Randall, a renowned luxury footwear and accessory brand, offers a comprehensive size guide to ensure the perfect fit for every customer. Founded by Jessie Randall and Brian Murphy, the brand is celebrated for its elegant designs and commitment to quality. The size guide is designed to cater to a wide range of foot sizes, providing detailed measurements for both men’s and women’s footwear. Recently, Loeffler Randall expanded its size options, introducing a U.S. size 12 (equivalent to EU size 44), reflecting its dedication to inclusivity and meeting diverse customer needs. This guide helps shoppers navigate the sizing chart confidently, ensuring comfort and style. Whether you’re looking for sleek heels or versatile flats, Loeffler Randall’s size guide is an essential tool for finding your ideal fit. By referencing this guide, customers can make informed decisions, avoiding the hassle of returns and exchanges. The brand’s focus on precision and inclusivity makes it a trusted choice for discerning shoppers seeking premium footwear.

Understanding the Loeffler Randall Size Chart

Loeffler Randall’s size chart is a valuable tool for ensuring a perfect fit. The chart provides a detailed breakdown of U.S. and EU sizes, ranging from 5 to 12 for women, with corresponding EU sizes from 35 to 44. Recently, the brand expanded its offerings to include U.S. size 12, making it more inclusive for customers with larger foot sizes. The chart is designed to help shoppers understand how their foot length corresponds to specific sizes, ensuring comfort and style. For instance, a U.S. size 9 typically aligns with an EU size 39, while a U.S. size 12 matches an EU size 44. The guide also offers fit recommendations, such as sizing up for wider feet or average widths. This attention to detail ensures that customers can make informed decisions when selecting their footwear. By referencing the size chart, shoppers can avoid the inconvenience of returns and exchanges, making their purchasing experience seamless and satisfying.

How to Measure Your Foot for the Perfect Fit

To ensure the best fit when shopping for Loeffler Randall footwear, accurate foot measurement is essential. Begin by standing on a flat surface, as feet expand when bearing weight. Place your foot on a ruler or use a Brannock device, commonly found in shoe stores, to measure the length and width. For length, measure from the heel to the tip of the longest toe. For width, measure across the ball of the foot at its widest point. Compare these measurements to the Loeffler Randall size chart, which provides U.S. and EU size equivalents. If your foot is between sizes, consider the brand’s recommendation to size up for wider feet or average widths. This step ensures a comfortable and stylish fit, aligning with Loeffler Randall’s commitment to quality and precision in their footwear. By taking these measurements, you can confidently select the right size for your new shoes.

Loeffler Randall Size Guide for Women’s Footwear

Loeffler Randall offers a comprehensive size guide for women’s footwear, ensuring a perfect fit for every style. Their size chart ranges from U.S. 5 to 12, with corresponding EU sizes from 35 to 44. Each size is carefully calibrated to match the contour of the foot, providing comfort and support. For average-width feet, the brand recommends staying true to size, while wider feet may benefit from sizing up by half to one full size. Loeffler Randall also includes fit notes on product pages, offering specific guidance for styles that may run slightly narrow or wide. Additionally, the recent introduction of U.S. size 12 (EU 44) reflects the brand’s commitment to inclusivity and catering to a broader range of customers. By referencing the size guide and fit notes, women can confidently choose their ideal size, ensuring both style and comfort in every pair of Loeffler Randall shoes.

Loeffler Randall Size Guide for Men’s Footwear

Loeffler Randall is primarily recognized for its women’s footwear collection, and while the brand has expanded its offerings, men’s sizes are limited. The available men’s footwear sizes typically range from U.S. 7 to 13, catering to a standard fit. The brand emphasizes comfort and style, ensuring that each shoe aligns with the natural contour of the foot. For men with average-width feet, staying true to size is recommended, while those with wider feet may consider sizing up by half a size for optimal comfort. Loeffler Randall’s men’s footwear is crafted with premium materials, blending luxury and practicality. However, detailed size charts for men’s footwear are less prominently featured compared to women’s, so it’s advisable to refer to product-specific fit notes. The brand’s focus on quality and timeless design ensures that every pair, regardless of size, delivers both style and comfort for the modern man.

Size Conversion Between US and EU Standards

Understanding size conversion between US and EU standards is essential for a seamless shopping experience with Loeffler Randall. The brand provides a comprehensive size chart to help customers navigate the differences. US sizes typically range from 5 to 12, corresponding to EU sizes 35 to 44. For instance, a US size 8 aligns with an EU size 38, while a US size 10 corresponds to an EU size 40.5. This conversion ensures that customers can accurately match their foot measurements to the appropriate size. Loeffler Randall also offers fit recommendations, suggesting that those with average-width feet should stick to their usual size, while wider feet may benefit from sizing up. The brand’s commitment to size inclusivity, recently extending to a US size 12 (EU 44), reflects its dedication to accommodating diverse foot sizes. By referencing the size chart, customers can confidently select their ideal fit, ensuring both comfort and style in every pair of Loeffler Randall footwear.

How to Choose the Right Size Based on Foot Width

Choosing the right size based on foot width is crucial for optimal comfort and fit in Loeffler Randall footwear. The brand offers guidance to help customers make informed decisions. For average-width feet, Loeffler Randall recommends staying true to your usual size. However, for wider feet, they suggest sizing up by one full size to ensure a comfortable fit. Conversely, for narrower feet, sizing down by a half size may be necessary to prevent excessive room in the shoe. The brand also provides specific fit notes on product pages, which can be helpful for styles with unique features. For example, some styles may run slightly narrow or wide, and the size guide will reflect these nuances. By considering foot width and following these recommendations, customers can enjoy a more personalized and comfortable fit. This attention to detail ensures that every pair of Loeffler Randall shoes meets individual needs, whether for casual wear or special occasions.

Loeffler Randall’s Expanded Size Options

Loeffler Randall has recently expanded its size range to cater to a broader audience, reflecting a commitment to inclusivity and diversity. The brand now offers a U.S. size 12, equivalent to an EU size 44, across select styles. This expansion ensures that customers with larger foot sizes can enjoy the same luxury, comfort, and timeless designs that Loeffler Randall is known for. The decision to introduce larger sizes was made in response to customer demand, demonstrating the brand’s dedication to meeting the needs of its loyal clientele. This move aligns with the growing trend in the fashion industry toward size inclusivity, making high-quality footwear accessible to more people. By offering extended sizes, Loeffler Randall continues to uphold its reputation for excellence while embracing a more inclusive approach to fashion. This expansion is a testament to the brand’s evolution and its mission to provide stylish, well-crafted shoes for every customer, regardless of size.

Fit Guide: How Loeffler Randall Shoes Feel

Loeffler Randall shoes are renowned for their exceptional comfort and timeless design. The brand emphasizes a snug yet comfortable fit, ensuring all-day wearability. Many customers report that the shoes feel true to size, with soft, high-quality materials that mold to the foot over time. For those with average-width feet, it’s recommended to stick to their usual size, while those with wider feet may benefit from sizing up by a half or full size. The Dahlia and Penny sandals, for example, are popular for their cushioned insoles and supportive straps, making them ideal for extended wear. The brand also offers styles with adjustable buckles, allowing for a customizable fit. Customer reviews often highlight the shoes’ ability to balance style and comfort, with many praising the luxurious feel of the materials. Whether you’re seeking heels, flats, or sandals, Loeffler Randall’s attention to detail ensures a superior fit that feels as good as it looks.

Return and Exchange Policy for Size-Related Issues

Loeffler Randall understands the importance of a perfect fit and offers a flexible return and exchange policy for size-related issues. Customers can return or exchange footwear within 30 days of purchase, provided the items are in their original condition with all tags attached. To initiate the process, simply visit the brand’s website and follow the return instructions. Free return shipping is available for U.S. customers, ensuring a hassle-free experience. For exchanges, the brand will cover the cost of shipping the new size to you. If a different style is preferred, a full refund will be issued once the return is processed. International customers are also eligible for returns, though shipping fees may apply. For assistance with sizing or to address any concerns, customers can contact Loeffler Randall’s customer service team at customerservice@loeffler Randall.com. The brand’s commitment to customer satisfaction ensures that finding the right fit is both easy and stress-free.

Loeffler Randall is dedicated to helping you find your perfect fit with their comprehensive size guide and commitment to quality craftsmanship. By understanding their size chart, measuring your foot accurately, and considering foot width, you can confidently select the right size for unparalleled comfort and style. The brand’s recent expansion to include U.S. size 12 (EU size 44) reflects its dedication to inclusivity, ensuring more customers can enjoy their luxurious footwear. If unsure, sizing up by 1/2 to 1 size is recommended for wider feet, while average-width feet may only need a 1/2 size adjustment. With a flexible return and exchange policy, Loeffler Randall makes it easy to try their shoes risk-free. Whether you’re shopping for everyday wear or special occasions, Loeffler Randall’s attention to detail and commitment to fit ensure you’ll find shoes that feel as good as they look. Trust Loeffler Randall to elevate your footwear wardrobe with timeless designs and a perfect fit.

prepositional phrases worksheet pdf

Prepositional phrases are essential for clear sentence structure, showing relationships between nouns and other words. They consist of a preposition, an object, and often modifiers, providing context and detail.

Definition and Purpose of Prepositional Phrases

A prepositional phrase is a group of words that begins with a preposition and ends with a noun or pronoun, often including modifiers. Its purpose is to show relationships between words, such as location, direction, or time. These phrases function as adjectives or adverbs, adding detail to sentences. For example, “under the table” describes where something is located. Prepositional phrases enhance clarity and context, making sentences more descriptive and meaningful.

Importance of Prepositional Phrases in Sentence Structure

Prepositional phrases are vital for adding clarity and context to sentences. They describe location, direction, time, or manner, making sentences more precise. For example, “The book is on the table” uses a prepositional phrase to show position. These phrases prevent ambiguity and enhance the sentence’s descriptive power. They can function as adjectives or adverbs, providing essential details about nouns or verbs. Without prepositional phrases, sentences would lack depth and specificity, making communication less effective.

Understanding the Structure of Prepositional Phrases

A prepositional phrase begins with a preposition, followed by a noun or pronoun (the object), and may include modifiers. It forms a meaningful unit in sentences.

Components of a Prepositional Phrase

A prepositional phrase consists of three main components: a preposition, an object (noun or pronoun), and optional modifiers. The preposition introduces the phrase, while the object is the noun or pronoun it relates to. Modifiers, such as adjectives or other words, provide additional details about the object. For example, in “in the park,” “in” is the preposition, “park” is the object, and no modifiers are present. In “under the bright sunny sky,” “under” is the preposition, “sky” is the object, and “bright” and “sunny” are modifiers.

Examples of Simple and Complex Prepositional Phrases

A simple prepositional phrase includes a preposition and its object, such as “in the park” or “under the table.” Complex phrases add modifiers, like adjectives, forming phrases such as “in the quiet, shaded park” or “under the small, wooden table.” These examples illustrate how phrases can vary in complexity while maintaining their basic structure. Simple phrases provide clarity, while complex ones add detail, enhancing sentence meaning and context.

Common Prepositions Used in Prepositional Phrases

Common prepositions include in, on, at, by, with, from, to, about, after, between, and many others. These words show relationships between nouns and other sentence elements, providing clarity and context.

Listing Frequently Used Prepositions

Common prepositions include in, on, at, by, with, from, to, about, after, between, under, above, through, during, before, after, up, down, around, behind, in front of, beside, between, among, within, without, along, across, into, out of, onto, off, from, about, over, under, through, during, before, after, and many others. These words are essential for forming prepositional phrases, as they express relationships of time, location, direction, or manner. They are often used in combination with nouns or pronouns to add detail to sentences.

Prepositions of Direction, Location, and Time

Prepositions like across, through, to, into, out of, onto, towards, from, in, on, at, by, with, about, after, between, under, above, during, before indicate direction, location, or time. Directional prepositions show movement, such as across the street or into the room. Location prepositions, like in the park or on the table, describe where something is. Time prepositions, such as at noon or during the meeting, specify when an action occurs. These prepositions help clarify context in sentences, making communication precise and clear.

Functions of Prepositional Phrases in Sentences

Prepositional phrases function as adjectives or adverbs, describing nouns or verbs. They explain how, when, or where actions occur, adding context and clarity to sentences.

Prepositional Phrases as Adjectives

Prepositional phrases often function as adjectives, describing or modifying nouns in a sentence. For example, in “The book on the table is mine,” the phrase “on the table” describes the book, providing more detail about its location. These phrases typically begin with a preposition and end with a noun or pronoun, which acts as the object of the preposition. They can also include modifiers, such as adjectives or other words, to add further context. This makes sentences more vivid and specific, helping readers better understand the relationship between the noun and its surroundings.

Prepositional Phrases as Adverbs

Prepositional phrases can function as adverbs, modifying verbs, adjectives, or other adverbs. They often answer questions like how, when, or where. For example, in “She ran across the field,” the phrase describes the manner of running. These phrases can also indicate location, as in “He arrived at the station,” or time, as in “They met after the meeting.” Prepositional phrases as adverbs provide context and detail, enhancing the clarity and depth of sentences.

Identifying Prepositional Phrases in Text

To identify prepositional phrases, locate a preposition followed by its object (a noun or pronoun) and any modifiers. Phrases often answer where or when, as in under the bridge or after the meeting. This helps distinguish them from other sentence structures.

Techniques for Locating Prepositional Phrases

To locate prepositional phrases, start by identifying a preposition, then find its object (a noun or pronoun) and any modifiers. Look for words that show relationships like location (in the park) or direction (toward the door). Underline or highlight prepositions first, then trace their phrases. Practice exercises, such as circling prepositions and underlining their objects, can improve identification skills. Using worksheets with sentences helps reinforce these techniques, making it easier to spot phrases in complex texts.

Exercises for Practicing Identification

Effective exercises for identifying prepositional phrases include underlining or circling prepositions and their objects in sentences. Worksheets with sentences containing multiple phrases can help improve recognition. Identify phrases that function as adjectives or adverbs by answering questions like Which noun? or Where?. Use fill-in-the-blank activities to insert prepositions into sentences. Matching games, where students pair prepositions with appropriate objects, also enhance understanding. Interactive tools and quizzes online provide immediate feedback, making practice engaging and efficient for learners of all levels.

Using Worksheets to Master Prepositional Phrases

Prepositional phrases worksheets in PDF format provide effective exercises for identifying and constructing phrases, enhancing grammar skills through practical application and clear examples.

Benefits of Worksheets for Learning

Prepositional phrases worksheets offer structured exercises to enhance grammar skills, providing clear examples and quizzes. They help students identify and construct phrases effectively, improving understanding of sentence structure. Worksheets cater to different grade levels, ensuring tailored learning experiences. Interactive activities and practical exercises make learning engaging and accessible. These resources are ideal for reinforcing classroom lessons and encouraging independent practice, fostering confidence in using prepositional phrases accurately.

Recommended Resources for Prepositional Phrase Worksheets

For effective learning, reliable resources like EasyTeacherWorksheets and Education.com offer a variety of prepositional phrases worksheet PDFs. These resources provide grade-specific exercises, quizzes, and activities to practice identifying and constructing phrases. Websites such as Teachers Pay Teachers and Google Classroom also feature customizable worksheets. Additionally, searching for “prepositional phrases worksheet PDF” on platforms like Google or Pinterest yields numerous free and downloadable options, ensuring access to diverse learning materials for all skill levels.

Advanced Concepts in Prepositional Phrases

Advanced topics include handling multiple phrases in a sentence and understanding nuances like direction, location, and time. Worksheets help master these complex structures through targeted exercises.

Multiple Prepositional Phrases in a Single Sentence

Multiple prepositional phrases can coexist in one sentence, adding depth and detail. For example, “She drove through the city to the park after sunset.” Each phrase starts with a preposition and ends with a noun or pronoun. They provide clarity on direction, location, or time. Worksheets often include exercises to identify and construct such sentences, ensuring proper placement and clarity to avoid confusion. Practice helps master complex structures, making sentences more descriptive and precise.

Common Mistakes to Avoid

When working with prepositional phrases, common errors include incorrect placement, missing objects, or overcomplicating sentences. For example, forgetting the object of the preposition can confuse meaning, as in “She ran into” (missing the object). Another mistake is misidentifying multi-word prepositions, such as “up against” or “due to.” Worksheets often highlight these errors, emphasizing the importance of clarity and proper structure. Regular practice helps learners avoid these pitfalls and improve their sentence construction skills effectively.

Prepositional phrases are vital for clear and precise communication. Worksheets provide effective tools for mastering their structure and function, ensuring confident use in sentence construction and comprehension.

Prepositional phrases consist of a preposition, an object, and often modifiers. They function as adjectives or adverbs, enhancing sentence clarity. Worksheets provide structured practice, helping learners identify and construct phrases. Common prepositions include words like in, on, and at. These phrases clarify relationships between nouns and other sentence elements. Effective use of worksheets ensures mastery of phrase structure and function, improving overall communication skills. Regular practice with exercises aids in identifying prepositional phrases in complex sentences, reinforcing grammar fundamentals.

Encouragement for Further Practice

Consistent practice is key to mastering prepositional phrases. Start with simple worksheets to build confidence, then gradually tackle more complex exercises. Focus on identifying prepositions like in, on, and at, and practice constructing phrases that function as adjectives or adverbs. Set aside time daily to review and complete exercises, as repetition reinforces grammar fundamentals. With dedication, you’ll become proficient in using prepositional phrases to enhance sentence structure and clarity. Keep practicing, and you’ll achieve mastery!

nirvana shatakam pdf

Nirvana Shatakam is a revered poem by Adi Shankara, embodying non-dualistic philosophy. It guides seekers through negation of the unreal and assertion of the real, offering spiritual liberation. Available as a free PDF, it remains a timeless resource for Advaita Vedanta practitioners.

Overview of the Text

Nirvana Shatakam, or Atma Shatakam, is a poetic composition by Adi Shankara, consisting of six profound verses. It encapsulates the essence of non-dualistic (Advaita) philosophy, guiding seekers to transcend the illusory self. The text systematically negates identification with the mind, intellect, ego, and physical elements, asserting the ultimate reality of pure consciousness. Each verse reinforces the idea of “I am consciousness” (Shivoham), emphasizing liberation from worldly attachments. The poem is both a meditation aid and a philosophical treatise, offering clarity on the nature of the self. Its concise structure makes it accessible for spiritual reflection and study. Available as a free PDF, Nirvana Shatakam remains a vital resource for those exploring Advaita Vedanta, providing timeless wisdom for contemporary spiritual practices and philosophical inquiry.

Historical Background of Nirvana Shatakam

Composed by Adi Shankara in the 7th century, Nirvana Shatakam is a foundational text of Advaita Vedanta. It emerged during a pivotal era in Indian philosophy, providing profound insights into non-dualistic thought and spiritual liberation.

The Author, Adi Shankara

Adi Shankara, an 8th-century Indian philosopher and theologian, is the revered author of Nirvana Shatakam. Born in Kerala, he is celebrated as a key figure in Advaita Vedanta, a school of Hindu philosophy emphasizing non-dualism. Shankara’s works profoundly influenced Indian thought, and his compositions remain central to spiritual studies; He wandered India, engaging in debates and establishing monasteries to spread his teachings. At a young age, he composed seminal texts, including commentaries on the Upanishads and Brahma Sutras. Nirvana Shatakam, one of his poetic masterpieces, reflects his deep understanding of the ultimate reality and the path to liberation. Today, his works, including Nirvana Shatakam, are widely available as free PDFs, offering timeless wisdom to seekers worldwide. Shankara’s legacy endures as a guiding light in Vedanta philosophy and spiritual enlightenment.

Key Philosophical Concepts in Nirvana Shatakam

Nirvana Shatakam explores non-dualistic meditation, negating the unreal and asserting the real, guiding seekers to identify with ultimate reality through Advaita Vedanta principles.

Non-Dualistic Meditation (Advaita Dhyana)

Nirvana Shatakam emphasizes Advaita Dhyana, a meditative practice centered on non-dual awareness. It guides practitioners to transcend the illusion of duality, recognizing the ultimate reality as pure consciousness. Through negation of the ego and external identifications, the seeker merges with the absolute Self. This meditation fosters a deep understanding of the unity of existence, dissolving distinctions between the individual self and the universal consciousness. The verses encourage introspection and detachment from worldly attachments, leading to liberation from cyclical suffering. By focusing on the formless and timeless essence, Advaita Dhyana offers a path to spiritual awakening and self-realization. This philosophical framework remains central to Nirvana Shatakam’s teachings, providing a practical guide for seekers of truth.

Negation of the Unreal and Assertion of the Real

Nirvana Shatakam employs a powerful method of negating the unreal to reveal the ultimate reality. It systematically rejects identification with the mind, intellect, ego, and senses, affirming the true Self. Through verses like “I am not the mind, intellect, or ego,” Adi Shankara directs the seeker to detach from transient phenomena. This negation is not a denial of existence but a refinement of perception, guiding the practitioner to focus on the immutable essence within. The text asserts the real as pure consciousness, beyond duality, emphasizing detachment from worldly attachments and desires. This philosophical approach aligns with Advaita Vedanta, offering a clear path to liberation. By negating the illusory and affirming the absolute, Nirvana Shatakam provides a profound tool for spiritual realization and self-discovery.

Structure and Verses of Nirvana Shatakam

Nirvana Shatakam consists of six profound verses by Adi Shankara, each negating the unreal and asserting the real, guiding seekers through non-dualistic meditation to liberation.

Analysis of the Six Verses

The six verses of Nirvana Shatakam systematically negate identification with the temporary and illusory, guiding the seeker to realize their true nature. Each verse refutes attachment to the mind, intellect, senses, and physical elements, emphasizing the transcendence of duality. The first verse denies the mind, ego, and memory, asserting the identity beyond the material world. Subsequent verses reinforce this by rejecting the five elements and the body, leading to the ultimate realization of the self as pure consciousness. The poem culminates in the assertion, “Shivoham Shivoham” (“I am Shiva”), symbolizing liberation from all limitations. This structured approach embodies the essence of Advaita Vedanta, offering a profound path to self-realization and spiritual freedom.

Spiritual Significance and Modern Relevance

Nirvana Shatakam offers timeless wisdom for spiritual growth, emphasizing self-realization and liberation. Its principles of non-dualism resonate deeply, making it a vital text for modern seekers of inner peace and enlightenment.

Application in Contemporary Spiritual Practices

Nirvana Shatakam’s teachings are widely applied in modern spiritual practices, offering a pathway to self-realization. Its emphasis on non-dualistic meditation and negation of the unreal resonates with contemporary seekers. The text’s availability as a free PDF has made it accessible to a global audience, facilitating its integration into daily meditation routines and philosophical studies. Many spiritual leaders and organizations recommend it as a tool for inner transformation, aligning with the principles of Advaita Vedanta. By affirming the true nature of the self, Nirvana Shatakam continues to inspire individuals in their journey toward liberation and enlightenment, proving its relevance in today’s diverse spiritual landscape.

Downloading Nirvana Shatakam PDF

The Nirvana Shatakam PDF is freely available for download from various spiritual websites, including Vedanta Spiritual Library and theheartofthesun.com, offering easy access to this sacred text.

Free PDF Sources and Download Options

The Nirvana Shatakam PDF is widely available for free download from reputable spiritual and philosophical websites. Platforms like theheartofthesun.com and the Vedanta Spiritual Library offer direct links to download the text in various formats, including PDF, Word Doc, and Text File. Additionally, websites such as celextel.org provide single-page processed JP2 ZIP files for easy access. Many of these sources also include translations, commentaries, and interpretations of the verses, making them invaluable for deeper understanding. Some websites offer lyrics with meanings and MP3 downloads for chanting purposes. These resources are freely distributed to facilitate spiritual growth and are compatible with various devices. Ensure to visit trusted sites to download the authentic version of this sacred text.

arris sbg10 manual

The Arris SBG10 manual provides essential guidance for setting up and optimizing your DOCSIS 3.0 cable modem and Wi-Fi router. Designed for both new and experienced users, this guide offers step-by-step instructions, troubleshooting tips, and advanced configuration options to ensure seamless internet connectivity and enhanced performance.

1.1 Overview of the Arris SURFboard SBG10

The Arris SURFboard SBG10 is a DOCSIS 3.0 cable modem and Wi-Fi router combo, offering high-speed internet connectivity. With 16×4 channel bonding, it supports download speeds up to 686 Mbps and upload speeds up to 131 Mbps. This device features dual-band Wi-Fi, Ethernet ports, and compatibility with major ISPs like Comcast, Cox, and Spectrum. Designed for seamless streaming and browsing, it combines modem and router functionality in one compact unit, making it a versatile choice for home or small business networks.

1.2 Importance of the User Manual

The Arris SBG10 user manual is essential for understanding and utilizing the device’s full potential. It provides detailed instructions for installation, configuration, and troubleshooting, ensuring a smooth setup process. The manual also covers advanced features, such as optimizing Wi-Fi settings and securing your network. By following the guidelines, users can resolve common issues, improve performance, and maintain compatibility with their internet service provider. This resource is crucial for both novice and experienced users to maximize the SBG10’s capabilities effectively.

Setting Up the Arris SBG10

Setting up the Arris SBG10 involves connecting cables, powering on the device, and following the quick start guide for initial configuration. Ensure proper installation for optimal performance and connectivity.

2.1 Unboxing and Physical Installation

Start by carefully unboxing the Arris SBG10 modem/router combo. Ensure all components, including the power cord, Ethernet cables, and Quick Start Guide, are included. Locate a suitable location for installation, ensuring good airflow and proximity to your devices. Connect the coaxial cable to the modem’s port and plug in the power cord. Turn on the device and wait for the LED lights to stabilize, indicating proper operation. This step is crucial for establishing a stable internet connection.

2.2 Quick Start Guide for Initial Setup

Power on the Arris SBG10 and ensure it is connected to your coaxial cable and power source. Download the ARRIS SURFboard Manager app by scanning the QR code in the manual. Follow the in-app instructions to set up your Wi-Fi network, including creating a network name and password. Once the setup is complete, test your internet connection by connecting a device to the new network. This streamlined process ensures a quick and secure setup for your home or small business network.

2.3 Downloading and Installing the ARRIS SURFboard Manager Mobile App

To manage your Arris SBG10, download the ARRIS SURFboard Manager app from the Apple App Store or Google Play Store. Scan the QR code provided in the manual or search for “ARRIS SURFboard Manager.” Install the app and follow the on-screen instructions to connect it to your modem. This app enables easy setup, network monitoring, and customization of Wi-Fi settings, ensuring a seamless experience for managing your home or small business network efficiently.

Key Features of the Arris SBG10

The Arris SBG10 combines a DOCSIS 3.0 cable modem with a built-in Wi-Fi router, offering dual-band connectivity, Gigabit Ethernet ports, and compatibility with major ISPs for reliable performance.

3.1 DOCSIS 3.0 Technology and Speed Capabilities

The Arris SBG10 leverages DOCSIS 3.0 technology, offering 16×4 channel bonding for download speeds up to 686 Mbps and upload speeds up to 131 Mbps. This ensures smooth streaming, gaming, and online activities. With its advanced modulation techniques, it efficiently manages bandwidth, delivering reliable high-speed internet for multiple devices. This technology is ideal for demanding applications, making it a robust choice for home and small business networks.

3.2 Wi-Fi and Ethernet Connectivity Options

The Arris SBG10 supports dual-band Wi-Fi, offering both 2.4 GHz and 5 GHz frequencies for flexible connectivity. The 5 GHz band is ideal for high-bandwidth activities like streaming and gaming, while the 2.4 GHz band provides broader coverage for basic devices. Additionally, the modem features Gigabit Ethernet ports for wired connections, ensuring reliable and fast data transfer. This combination of Wi-Fi and Ethernet options caters to diverse networking needs, making it suitable for homes and small businesses with multiple devices.

3.4 Compatibility with Major Internet Service Providers

The Arris SBG10 is compatible with leading internet service providers, including Comcast Xfinity, Cox, and Spectrum. Its DOCSIS 3.0 certification ensures seamless integration with these services, delivering high-speed connectivity. This versatility makes it an ideal choice for users across different networks, providing reliable performance and compatibility with various service plans. The modem’s compatibility ensures a smooth and efficient internet experience for both home and small business environments.

Troubleshooting Common Issues

Identify and resolve connectivity problems, reset the modem, and understand LED status indicators for diagnosing issues. This section helps restore optimal performance and ensures stable internet access.

4.1 Identifying and Resolving Connection Problems

Troubleshoot connectivity issues by checking physical connections, restarting the modem, and verifying LED status. Ensure your Wi-Fi network is secure and properly configured. If issues persist, reset the modem or update firmware for optimal performance. Refer to the user manual for detailed steps to diagnose and resolve common connection problems effectively, ensuring a stable and reliable internet experience for all devices connected to the Arris SBG10.

4;2 Resetting the Modem to Factory Settings

To reset the Arris SBG10 modem to factory settings, locate the indented Reset button, typically found on the back or bottom. Using a paper clip or small pin, press and hold the button for 10 seconds. Release it and allow the modem to reboot. This process erases all custom settings, such as Wi-Fi passwords and network configurations. Ensure you have necessary setup information ready, as you’ll need to reconfigure the modem after the reset. This step should be taken only when necessary, such as resolving persistent issues. After resetting, check the LED indicators to confirm the modem is functioning correctly, and proceed to set up your network again. If unsure, consider contacting support for assistance. Resetting via the web interface may also be possible, typically found in sections like Maintenance or Advanced Settings, but the physical button is the primary method. Remember to back up any important settings beforehand to save time during the setup process. If uncomfortable performing the reset, reaching out to the manufacturer or ISP for help is advisable. Once reset, be prepared to re-enter all configurations manually, which may be time-consuming without a backup. Understanding the implications and being prepared is key to successfully resetting your modem.

4.3 Understanding LED Status Indicators

The Arris SBG10 features LED status indicators that provide real-time feedback on its operational state. The Power LED indicates whether the modem is on, while the Downstream and Upstream LEDs show the status of your internet connection. The Wi-Fi LED displays the router’s wireless activity. These LEDs use color codes (solid, blinking, or off) to signal issues like no internet connection or firmware updates. Refer to the manual for specific color meanings and troubleshooting guidance. Monitoring these LEDs helps quickly identify and resolve connectivity problems. If an LED indicates an issue, consult the manual or contact support for assistance. Regularly checking the LEDs ensures optimal performance and early detection of potential issues. This feature is especially useful for diagnosing problems without advanced technical knowledge. Familiarizing yourself with the LED patterns can save time and help maintain a stable internet connection. Always ensure the LEDs are functioning correctly after setup or updates. If unsure about a particular LED status, the user manual provides detailed explanations and solutions. This visual feedback system is a key tool for managing your modem’s health and performance. Use it to stay proactive in maintaining your network’s reliability and speed. Checking the LEDs should be your first step when troubleshooting connectivity issues. Their status can guide you toward the correct solution, whether it’s a simple reboot or a more complex configuration adjustment. By understanding the LED indicators, you can efficiently monitor and maintain your Arris SBG10 modem for uninterrupted service.

Advanced Configuration Options

The Arris SBG10 offers advanced settings through its web interface, allowing users to customize wireless networks, prioritize traffic, and optimize performance for specific needs and devices.

5.1 Accessing the Web Interface for Custom Settings

To access the Arris SBG10’s web interface, open a web browser and navigate to the default IP address 192.168.0.1. Log in using the admin credentials found in the manual. From here, users can customize settings such as DHCP configurations, port forwarding, and wireless network parameters. The interface also allows for firmware updates and advanced security configurations, ensuring tailored performance for specific networking needs and enhanced control over your internet experience.

5.2 Configuring Wireless Network Settings

Configure your wireless network settings through the Arris SBG10’s web interface. Set a unique SSID and password for enhanced security. Enable WPA2 encryption and select the 5GHz band for better performance. Adjust the channel to minimize interference and optimize coverage. Save changes to apply updates, ensuring a secure and stable wireless connection tailored to your networking needs.

Maintenance and Update Tips

Regularly update your Arris SBG10 firmware for optimal performance. Perform routine maintenance to ensure stability and security. Use the ARRIS SURFboard Manager app to check for updates and manage settings effectively.

6.1 Updating Firmware for Optimal Performance

Updating the firmware of your Arris SBG10 ensures you have the latest features and security patches. To update, access the web interface through a browser, navigate to the advanced settings, and select the firmware update option. The ARRIS SURFboard Manager app also simplifies this process by notifying you of available updates and guiding you through installation. Regular updates maintain performance, stability, and compatibility with your internet service provider.

6.2 Regular Maintenance to Ensure Stability

Regular maintenance is crucial for ensuring the stability of your Arris SBG10. Periodically reset the modem to clear cached data and resolve connectivity issues. Check for loose cables and ensure all connections are secure. Use compressed air to clean vents and prevent overheating. Regularly review and update your Wi-Fi settings to optimize performance. Utilize the ARRIS SURFboard Manager app to monitor system health and receive notifications for firmware updates or potential issues.

Security Features and Best Practices

The Arris SBG10 features built-in security measures like firewall protection and secure login. Enable WPA3 encryption for Wi-Fi networks and regularly update firmware to prevent vulnerabilities. Always use strong, unique passwords and disable remote management to enhance security. Periodically review connected devices and update settings to maintain a secure network environment.

7.1 Built-In Security Measures

The Arris SBG10 incorporates robust security features, including a built-in firewall and secure WPA3 encryption for wireless networks. It supports SPI and NAT firewalls to block unauthorized access. The modem also features secure remote access controls, ensuring only authorized users can modify settings. Additionally, it includes intrusion detection and alert systems to notify users of potential threats. These measures provide a strong foundation for protecting your home or small business network from cyber threats and vulnerabilities.

7.2 Recommended Settings for Enhanced Security

To enhance security on your Arris SBG10, enable WPA3 encryption for wireless networks and regularly update firmware. Change the default admin password and disable WPS for added protection. Use the ARRIS SURFboard Manager app to monitor connected devices and block unauthorized access. Enable HTTPS access for remote management and schedule regular network audits to identify vulnerabilities. These settings help safeguard your network against potential threats and ensure a secure browsing experience for all connected devices.

User Guide and Additional Resources

The Arris SBG10 manual is available as a PDF, offering detailed setup and troubleshooting guides. Additional resources, including FAQs and support, can be found online.

8.1 Navigating the PDF User Manual

The Arris SBG10 user manual is a comprehensive PDF guide designed to help users understand and utilize their modem effectively. The manual is structured into clear sections, including installation, configuration, and troubleshooting. Users can navigate easily using the table of contents, indexes, and hyperlinks. Key features include detailed diagrams, step-by-step instructions, and FAQs. The PDF also supports keyword searches, allowing quick access to specific topics. For optimal navigation, users can bookmark pages or use zoom tools to enhance readability.

8.2 Accessing Online Support and FAQs

For additional assistance, the Arris SBG10 manual directs users to online support resources, including FAQs, troubleshooting guides, and firmware updates. Visit the official Arris website or support portal to access these tools. The FAQs section addresses common issues, while the knowledge base offers in-depth solutions. Users can also engage with community forums to share experiences and receive peer support. Utilize search bars to quickly find relevant information, ensuring efficient problem-solving and optimal device performance.

The Arris SBG10 manual is a comprehensive guide that empowers users to maximize their internet experience. From setup to advanced configurations, it ensures optimal performance and security. By following the manual, users can resolve issues, update firmware, and explore additional resources; The SBG10’s DOCSIS 3.0 technology and Wi-Fi capabilities make it a reliable choice for streaming, gaming, and more. With proper use, this device delivers fast speeds and stable connections, enhancing your online activities for years to come.

aprilaire automatic humidifier control model 60 manual

The Aprilaire Model 60 is a high-efficiency automatic humidifier control designed to maintain optimal indoor humidity levels, enhancing comfort and indoor air quality year-round.

Overview of the Aprilaire Model 60 Humidifier Control

The Aprilaire Model 60 is a advanced humidifier control system designed to regulate indoor humidity levels automatically. It features both automatic and manual operation modes, allowing users to customize humidity settings based on their preferences. The system is equipped with an outdoor temperature sensor, which helps optimize humidity levels by considering external weather conditions. This feature prevents excessive moisture buildup and potential condensation issues. The Model 60 is compatible with various Aprilaire humidifiers, including the 400, 500, 600, and 700 series, making it a versatile solution for different home sizes and humidity needs. Its digital interface provides clear feedback, while the manual mode offers precise control for specific scenarios. The system is energy-efficient and designed to enhance indoor air quality, ensuring a comfortable living environment year-round.

Key Features and Benefits of the Model 60

The Aprilaire Model 60 offers advanced features designed to ensure precise humidity control and optimal performance. Its dual-mode operation allows for both automatic and manual control, providing flexibility based on user preferences. The system includes an outdoor temperature sensor, which adjusts humidity levels according to external conditions to prevent condensation and over-humidification. The digital display provides clear feedback and easy adjustment of settings. Additionally, the Model 60 is compatible with a wide range of Aprilaire humidifiers, including the 400, 500, 600, and 700 series, making it a versatile solution for various home sizes and humidity needs. Its energy-efficient design and ability to maintain consistent indoor air quality make it a reliable choice for enhancing comfort and health in residential spaces.

Installation Instructions for Aprilaire Model 60

Begin by unpacking all components and ensuring the location meets safety requirements. Follow step-by-step wiring and sensor placement instructions to complete the setup successfully.

Pre-Installation Safety Precautions

Before installing the Aprilaire Model 60, ensure all safety guidelines are followed to prevent potential hazards. Disconnect electrical power to the furnace and humidifier to avoid electrical shock. Handle sharp edges carefully to prevent injuries. Avoid mounting the control on the supply plenum or duct, as it cannot withstand high temperatures. Do not install the control downstream of the bypass outlet, as this may cause incorrect humidity readings. Ensure the control is not mounted in direct sunlight or near exhaust vents. If installing the outdoor temperature sensor, place it on the north, east, or west side of the house, above the snow line, and at least 3 feet from vents. Always follow the manufacturer’s instructions to ensure safe and proper installation.

Step-by-Step Installation Guide

Begin by unpacking the Aprilaire Model 60 control and verifying all components are included. Next, disassemble the control by removing the knob and cover. Check the Change Water Panel indicator setting, adjusting if necessary based on your heating season and water hardness. Mount the humidifier control on the return duct, ensuring it is at least 6 inches upstream from any bypass ductwork or fresh air intake. Drill a 3/4-inch hole for the RH sensor and secure the control with sheet metal screws. Mount the outdoor temperature sensor on the north, east, or west side of your home, above the snow line, and at least 3 feet from vents. Route the sensor wire to the control, ensuring it does not run alongside high-voltage wires. Finally, connect the wires to the appropriate terminals on the control, ensuring all connections are secure and meet the manufacturer’s specifications. Once installed, test the system to ensure proper functionality.

Mounting the Humidifier Control and Outdoor Temperature Sensor

Mount the Aprilaire Model 60 humidifier control on the return duct, ensuring it is at least 6 inches upstream from any bypass ductwork or fresh air intake. Avoid installing it on the supply plenum or near high-temperature areas. The outdoor temperature sensor must be mounted on the north, east, or west side of the home, above the snow line, and at least 3 feet away from exhaust vents. Ensure the sensor is not exposed to direct sunlight or obstructed by debris. Route the sensor wire carefully, avoiding high-voltage lines, and secure it to the control terminals. Proper mounting ensures accurate humidity readings and optimal system performance. Follow all safety guidelines to prevent damage or malfunction.

Operating the Aprilaire Model 60 Humidifier Control

The Aprilaire Model 60 operates in automatic or manual modes, adjusting humidity based on outdoor temperature and indoor conditions. The outdoor sensor optimizes performance by preventing over-humidification.

Understanding Automatic Mode Operation

In automatic mode, the Aprilaire Model 60 uses an outdoor temperature sensor to regulate humidity levels, adjusting the humidistat settings to prevent over-humidification when temperatures drop. The system ensures that humidity levels remain balanced, providing optimal comfort while preventing condensation issues. The sensor allows the humidifier to adapt to changing outdoor conditions, ensuring efficient operation. If the outdoor temperature falls, the system automatically reduces humidity output to match the lower moisture capacity of the colder air. This feature helps maintain a consistent relative humidity level, improving indoor air quality and preventing potential water damage or mold growth. The system is designed to operate seamlessly, requiring minimal user intervention once installed and configured correctly.

Using Manual Mode for Precise Humidity Control

In manual mode, the Aprilaire Model 60 allows users to set a fixed humidity level, providing precise control over indoor humidity. This mode is ideal for situations where the outdoor temperature sensor is not installed or when specific humidity requirements need to be maintained. To operate in manual mode, the mode switch is positioned to “MAN,” and the manual mode label is applied. Users can then adjust the knob to the desired humidity level, and the system will maintain that setting without automatic adjustments based on outdoor conditions.

Manual mode is particularly useful in climates with stable temperatures or when precise humidity control is necessary. The system will operate based on the set level, ensuring consistent indoor comfort. This feature offers flexibility for users who prefer direct control over their humidification system.

Maintenance and Troubleshooting

Regular maintenance ensures optimal performance. Replace water panels as indicated by the control’s timer or yellow light. Clean the humidifier and sensor to prevent malfunction. Troubleshoot issues like incorrect humidity levels or sensor malfunctions by checking connections and settings. Refer to the manual for detailed solutions and reset procedures. Proper care extends the system’s lifespan and maintains indoor air quality. Always follow safety guidelines during maintenance to avoid electrical or water damage. For persistent problems, contact a certified technician for professional assistance and ensure the system operates efficiently. Regular upkeep ensures consistent humidity control and prevents potential issues. Always adhere to the manufacturer’s recommendations for maintenance schedules. Troubleshooting common issues promptly prevents major repairs. The system’s design allows for easy diagnostics and repairs, making it user-friendly. By addressing problems early, you maintain your home’s comfort and energy efficiency. The Aprilaire Model 60 is built to last with proper care and attention, ensuring reliable performance year-round. For detailed troubleshooting steps, consult the user manual or contact Aprilaire support. Regular maintenance and timely troubleshooting are key to maximizing the system’s benefits and longevity. Always use genuine Aprilaire replacement parts for optimal performance. If unsure about any procedure, seek professional assistance to avoid damage or safety hazards. The system’s advanced features simplify maintenance and troubleshooting, making it accessible for homeowners. Keep the user manual handy for quick reference and guidance. Proper maintenance and troubleshooting ensure the Aprilaire Model 60 continues to provide superior humidity control and comfort in your home.

Regular Maintenance Tasks for Optimal Performance

Regular maintenance is essential to ensure the Aprilaire Model 60 operates efficiently and effectively. Replace the water panel as indicated by the control’s timer or when the yellow light illuminates. Clean the humidifier and outdoor temperature sensor periodically to prevent mineral buildup and ensure accurate readings. Check the electrical connections and wiring for any damage or loose contacts. Inspect the drain system to ensure proper water flow and avoid blockages. Follow the manufacturer’s instructions for resetting the water panel timer after replacement. Additionally, verify the outdoor temperature sensor’s placement to ensure it’s mounted correctly and free from obstructions. Refer to the user manual for detailed maintenance schedules and procedures. Regular upkeep helps maintain optimal humidity levels, prevents system malfunctions, and extends the lifespan of the unit. Always follow safety guidelines when performing maintenance tasks. For persistent issues, consult the troubleshooting guide or contact a certified technician. Proper care ensures the Aprilaire Model 60 continues to deliver reliable performance and enhance indoor air quality.

Troubleshooting Common Issues with the Model 60

Troubleshooting the Aprilaire Model 60 involves identifying common issues and resolving them promptly to ensure optimal performance. If the humidifier does not turn on, check the power supply and ensure the control is set to “ON.” Verify that the humidistat is correctly set and that the outdoor temperature sensor is functioning properly. If the system produces insufficient humidity, inspect the water panel for mineral buildup and clean it as needed. The yellow indicator light signaling water panel replacement should be addressed promptly to maintain efficiency. Ensure the outdoor temperature sensor is mounted correctly, away from direct sunlight and obstructions, to provide accurate readings. For persistent issues, consult the user manual or contact a certified technician. Regular maintenance and timely troubleshooting ensure the Model 60 operates effectively, maintaining desired humidity levels and preventing system malfunctions. Always follow safety guidelines when addressing electrical or mechanical components.

Key Features and Advantages

The Aprilaire Model 60 offers advanced automatic digital humidifier control, ensuring precise humidity levels. It features an outdoor temperature sensor for enhanced performance and energy efficiency. The system provides manual mode options for tailored control, adaptability to varying home conditions, and seamless integration with HVAC systems. Its design promotes optimal indoor air quality and comfort while minimizing condensation risks. The Model 60 is a reliable solution for maintaining a healthy and comfortable indoor environment year-round, with user-friendly operation and durable construction.

Automatic Digital Humidifier Control

The Aprilaire Model 60 features a state-of-the-art automatic digital humidifier control system designed for precise and efficient humidity management. This advanced control system automatically adjusts humidity levels based on outdoor temperatures, ensuring optimal indoor air quality without over-humidification. The digital interface provides clear and intuitive operation, allowing homeowners to monitor and control humidity levels effortlessly. Equipped with a built-in outdoor temperature sensor, the Model 60 adapts to changing conditions, preventing condensation buildup on windows and walls. Additionally, it offers a manual override option for customizable settings, making it versatile for various home environments. The system integrates seamlessly with existing HVAC systems, providing reliable performance and enhancing overall comfort. Its automatic features ensure minimal maintenance and energy-efficient operation, making it an ideal solution for maintaining a healthy and comfortable home environment year-round.

Outdoor Temperature Sensor for Enhanced Performance

The Aprilaire Model 60 includes an advanced outdoor temperature sensor to optimize humidity control based on external conditions. This sensor ensures the system adjusts humidity levels accurately, preventing over-humidification and condensation issues. It must be mounted on the north, east, or west side of the home, avoiding direct sunlight, and placed at least 3 feet from exhaust vents. The sensor should also be positioned above the expected snow line for accurate temperature readings. Incorrect placement can lead to faulty humidity measurements, affecting performance. By integrating outdoor temperature data, the Model 60 delivers enhanced comfort and energy efficiency, automatically adapting to seasonal changes. This feature is crucial for maintaining optimal indoor air quality and preventing potential damage from excessive moisture. The sensor’s data ensures the humidifier operates seamlessly, providing a healthy and comfortable living environment year-round.

ww scale instruction manual

Welcome to the WW Scale Instruction Manual! This guide helps you understand and utilize your scale’s features, from basic setup to advanced body composition tracking. Discover how to get the most out of your WW Scale for accurate measurements and personalized health insights. Follow these steps to ensure optimal performance and troubleshooting for a seamless experience.

1.1 Overview of the WW Scale and Its Features

The WW Scale by Conair is a smart, battery-operated device designed to measure your weight and body composition, including fat, water, and bone mass. It also captures your heart rate, providing comprehensive health insights. Compatible with the free WW Scales app, it allows seamless tracking of your measurements. With a user-friendly interface, it supports multiple users, ensuring each person’s data remains personalized and accurate.

1.2 Importance of Following the Instruction Manual

Following the WW Scale instruction manual ensures accurate measurements, proper setup, and optimal performance. It helps you understand advanced features like body composition tracking and app connectivity. Adhering to the guide prevents errors and extends the scale’s lifespan. By following the manual, you can troubleshoot issues efficiently and make the most of your WW Scale for effective weight and health management.

Getting Started with Your WW Scale

Unbox and set up your WW Scale, ensuring proper placement on a flat surface. Charge the battery fully before first use for smooth operation and accurate measurements.

2.1 Unboxing and Initial Setup

Carefully unbox your WW Scale and ensure all components, including the scale, battery, and manual, are included. Place the scale on a flat, stable surface, avoiding carpet or uneven areas for accurate readings. Insert the battery as per the instructions, ensuring the compartment is securely closed. Turn on the scale and allow it to initialize. Follow the on-screen prompts for calibration and initial setup to prepare for use.

2.2 Charging and Battery Installation

Insert the battery into the WW Scale as indicated in the manual, ensuring the compartment is securely closed. Use the correct battery type for optimal performance. Avoid mixing old and new batteries to prevent power issues. The scale is designed to operate efficiently with minimal setup. Once installed, the scale will automatically detect the battery and initialize. No charging is required for most models, as they are battery-operated. Always refer to the manual for specific instructions.

Basic Operations of the WW Scale

Turn on the scale, calibrate it, and step on to measure weight. The scale automatically turns off after use, ensuring efficient and accurate results every time.

3.1 Turning On and Calibrating the Scale

To begin using your WW Scale, ensure it is placed on a flat, stable surface. Press the power button to turn it on. The scale will display “0.00” and flash “CAL” for calibration. Step off the scale until it shows “CAL” and “0.00” again, indicating it’s ready for use. Proper calibration ensures accurate weight measurements every time. Follow these steps carefully for optimal performance.

3.2 Weighing Yourself: Step-by-Step Guide

Step 1: Ensure the scale is on a flat, stable surface. Step 2: Press the power button to turn it on. Step 3: Stand barefoot on the scale, ensuring good contact with the sensors. Step 4: Remain still until your weight and body composition metrics are displayed. Step 5: Carefully step off and allow the scale to automatically turn off. This process ensures accurate and reliable measurements for effective tracking of your health goals.

Advanced Features of the WW Scale

Step 1: Ensure the scale is powered on and calibrated. Step 2: Stand barefoot on the platform, aligning your feet with the sensors. Step 3: Remain still until measurements are taken. Step 4: Review your weight, body fat, water, bone mass, and BMI on the display. Step 5: Step off carefully and allow the scale to auto-turn off. This ensures precise and consistent readings for tracking your health progress effectively.

4.1 Measuring Body Composition (Fat, Water, Bone Mass)

The WW Scale offers advanced body composition analysis, measuring fat, water, bone mass, and BMI. Using bioelectrical impedance, it provides detailed insights into your body. Ensure proper calibration and stand barefoot for accurate readings. This feature helps monitor progress toward fitness goals and supports overall health management effectively for a better understanding of your body composition.

4.2 Tracking BMI and Hydration Levels

The WW Scale tracks BMI and hydration levels, providing insights into your body’s health trends. By measuring bioelectrical impedance, it calculates hydration and BMI, helping you monitor progress. Regular tracking supports healthy lifestyle choices and weight management goals effectively. This feature complements body fat and bone mass measurements, offering a comprehensive view of your health.

Customizing Your WW Scale

Customize your WW Scale by setting up user profiles and adjusting units of measurement for a personalized experience. Easily tailor settings to meet individual preferences.

5.1 Setting Up User Profiles

Setting up user profiles on your WW Scale allows multiple users to track their progress independently. Each profile stores unique data, ensuring personalized results. To create a profile, open the WW Scales by Conair app, navigate to the settings menu, and select “Add User.” Enter the user’s details, such as name, age, and height, and sync the scale. This feature ensures accurate measurements and privacy for each user, making it ideal for shared households. Regularly update profiles to reflect changes in age or other personal details for consistent tracking. This step-by-step process is straightforward and enhances your overall experience with the scale.

5.2 Adjusting Units of Measurement

Adjusting the units of measurement on your WW Scale is straightforward. Open the WW Scales by Conair app, go to the settings menu, and select “Units.” Choose from options like pounds, kilograms, or stones. The scale will confirm the change, ensuring accurate readings. For quick adjustments, some users prefer using the app rather than the scale’s interface. This feature is ideal for households with international users, providing flexibility and convenience. Always ensure the unit matches your preference for precise tracking.

Connecting the WW Scale to the App

To connect your WW Scale to the app, open the WW Scales by Conair app, enable Bluetooth, and ensure your scale is in pairing mode. Follow the in-app instructions to complete the sync for seamless data tracking.

6.1 Downloading and Installing the WW Scales by Conair App

Visit the Apple App Store or Google Play Store to download the free WW Scales by Conair app. Search for the app, select it, and click “Download” or “Install.” Once installed, open the app and follow the on-screen instructions to create an account or sign in. Ensure your device has Bluetooth enabled for seamless pairing with your WW Scale.

6.2 Syncing Your Scale with the App for Data Tracking

Open the WW Scales by Conair app and ensure Bluetooth is enabled on your device. Select “Add Scale” and follow the prompts to pair your scale. Once connected, your weight and body composition data will automatically sync to the app. This seamless integration allows you to track your progress over time and set personalized health goals for effective weight management.

Troubleshooting Common Issues

Experiencing issues with your WW Scale? This section provides solutions for connectivity problems and measurement errors. Learn how to resolve these common concerns to ensure accurate readings and uninterrupted use of your scale. Troubleshooting tips will help you maintain seamless functionality and optimal performance. Follow these steps to address and fix any issues you encounter.

7.1 Resolving Connectivity Problems

If your WW Scale isn’t syncing with the app, ensure Bluetooth is enabled and your device is nearby. Restart both the scale and your smartphone, then reinstall the app. Check for firmware updates and verify your internet connection. If issues persist, reset the scale by pressing the reset button or refer to the troubleshooting guide in the app for further assistance. Connection problems are often easily resolved with these steps.

7.2 Fixing Measurement Errors

If your WW Scale shows incorrect readings, ensure it’s placed on a flat, stable surface. Calibrate the scale by pressing the reset button and following on-screen instructions. Check battery levels and replace them if low. Avoid using the scale on soft surfaces or carpets, as this can disrupt accuracy. If issues persist, perform a factory reset or contact customer support for further assistance. Accurate measurements are essential for reliable tracking.

Maintenance and Care of the WW Scale

Regularly clean the WW Scale with a soft, dry cloth to prevent dust buildup. Avoid harsh chemicals or abrasive cleaners. Check for firmware updates to ensure optimal performance. Store the scale in a cool, dry place to maintain accuracy and longevity. Proper care ensures reliable measurements and extends the product lifespan effectively.

8.1 Cleaning the Scale

To maintain your WW Scale’s accuracy and longevity, clean it regularly using a soft, dry cloth. Gently wipe the surface to remove dust or debris. Avoid harsh chemicals, abrasive cleaners, or excessive moisture, as they may damage the scale. For stubborn spots, dampen the cloth slightly but ensure it’s not soaking wet. Allow the scale to dry completely before use. Regular cleaning prevents dust buildup and ensures precise measurements over time.

8.2 Updating Firmware for Optimal Performance

Regular firmware updates ensure your WW Scale performs optimally. To update, open the WW Scales by Conair app and navigate to the settings menu. Check for available updates and follow the on-screen instructions to download and install the latest version. Updating enhances accuracy, adds new features, and improves security. Ensure the scale is connected to the app and has sufficient battery life during the update process to avoid interruptions.

Frequently Asked Questions (FAQs)

Explore common queries about the WW Scale, such as resetting profiles, troubleshooting errors, and app connectivity issues, to ensure smooth operation and address user concerns effectively.

9.1 Can Multiple Users Share the Same Scale?

Yes, multiple users can share the WW Scale by creating individual profiles. Each user’s data is stored separately, ensuring personalized tracking of weight, body composition, and BMI. The scale syncs with the app, allowing each profile to maintain privacy and accuracy. This feature is ideal for households with multiple health-conscious members aiming to track their progress independently. Regular updates ensure smooth multi-user functionality.

9.2 How to Reset Your Age or Profile Information

To reset your age or profile information on the WW Scale, follow these steps: Navigate to the settings menu on the scale or through the WW Scales by Conair app. Select the option to edit your profile, where you can update your age and other personal details. Save the changes to ensure accurate measurements. If issues persist, refer to the troubleshooting guide or contact customer support for assistance. Regular updates may be required for optimal functionality.

Mastering your WW Scale enhances weight management and health tracking. Use the app for data sync and personalized insights. Regular updates and proper care ensure longevity. Happy tracking!

10.1 Maximizing Your Experience with the WW Scale

To maximize your experience, sync your WW Scale with the app for seamless data tracking. Regular firmware updates ensure optimal performance. Explore advanced features like body composition analysis and hydration tracking. By following the manual’s guidelines, you can maintain accuracy and enjoy a user-friendly experience. Consistent use will help you achieve your health goals effectively.

10.2 Final Tips for Effective Weight Management

For effective weight management, track your progress consistently and use the WW Scale’s advanced features to monitor body composition and hydration levels. Stay consistent with your measurements and adjust your goals as needed. By combining regular use of the scale with a balanced lifestyle, you can achieve and maintain a healthy weight. Remember, patience and persistence are key to long-term success.

a gentleman’s guide to love and murder play

A Gentleman’s Guide to Love and Murder is a delightful musical comedy that blends dark humor with charming melodies, based on the 1907 novel Israel Rank. This witty tale follows Monty Navarro, a low-born man discovering his high-society lineage, as he hilariously navigates love, murder, and his quest for an earldom, all while maintaining his gentlemanly demeanor. The play’s clever plot twists, vibrant characters, and catchy music have made it a critically acclaimed favorite, earning numerous awards and captivating audiences worldwide with its unique blend of sophistication and slapstick humor.

Background and Setting

A Gentleman’s Guide to Love and Murder is set in England during the Edwardian era, a time of strict social hierarchy and class distinctions. The story revolves around the aristocratic D’Ysquith family, whose members are unaware that a distant, low-born relative, Monty Navarro, is eighth in line to the family’s earldom. The play’s backdrop is a mix of opulent estates, bustling London streets, and cozy village settings, each highlighting the stark contrasts of the era’s social structure.

The musical, based on the 1907 novel Israel Rank by Roy Horniman, combines dark humor with lighthearted melodies, creating a unique tone that balances murder, romance, and wit. The setting’s period details, from elaborate costumes to intricate set designs, immerse audiences in the early 20th-century British society. The play’s clever use of location shifts, from the intimacy of Monty’s lodgings to the grandeur of the D’Ysquith estates, underscores the themes of class and ambition. This richly crafted world provides the perfect stage for Monty’s rise through the ranks, blending satire, romance, and murder in a delightfully theatrical manner.

Production History

A Gentleman’s Guide to Love and Murder premiered at the Old Globe Theatre in San Diego in 2013 before making its Broadway debut at the Walter Kerr Theatre in November of the same year. Directed by Darko Tresnjak, the musical was an instant success, earning widespread critical acclaim for its witty dialogue, clever staging, and standout performances. The original Broadway cast featured Jefferson Mays in the groundbreaking role of multiple D’Ysquith family members, alongside Bryce Pinkham as Monty Navarro. The production won four Tony Awards in 2014, including Best Musical, Best Book of a Musical for Robert L. Freedman, Best Direction of a Musical for Tresnjak, and Best Featured Actress for Lisa O’Hare. Its innovative use of quick costume changes and comedic timing set a new standard for theatrical creativity. The musical has since been performed in numerous productions across the U.S. and internationally, cementing its place as a modern classic of American theater.

Plot Summary

A Gentleman’s Guide to Love and Murder follows Monty Navarro, a charming but penniless man who discovers he’s eighth in line to the D’Ysquith earldom. Navigating a web of murder, love, and societal expectations, Monty cleverly eliminates the D’Ysquith heirs while juggling his affections for Sibella and Phoebe, all with wit and panache.

Main Plot

A Gentleman’s Guide to Love and Murder centers around Monty Navarro, a charming yet impoverished man who discovers he is eighth in line to the D’Ysquith earldom. Determined to improve his station, Monty sets out to eliminate the heirs standing between him and the title, using wit, deception, and murder. Along the way, he navigates a tangled web of relationships, torn between his love for the beautiful but practical Phoebe D’Ysquith and his passion for the glamorous but self-serving Sibella Hallward. As Monty cleverly dispatches each D’Ysquith heir, he must maintain his gentlemanly facade while avoiding suspicion and balancing his romantic dilemmas. The story unfolds with dark humor, clever plot twists, and a satirical exploration of class and ambition, culminating in a delightful resolution that leaves Monty both victorious and reflective on the true cost of his pursuits.

Subplots

Within A Gentleman’s Guide to Love and Murder, several subplots enrich the narrative, adding depth to the characters and themes. One prominent subplot revolves around Monty’s romantic entanglements with two women: the kind-hearted Phoebe D’Ysquith and the glamorous Sibella Hallward. This love triangle creates tension, as Monty must choose between a life of stability with Phoebe and the passionate allure of Sibella. Another subplot involves the eccentric D’Ysquith family members, each with their own peculiarities, whose deaths serve as darkly comedic milestones in Monty’s rise to power. Additionally, the play explores themes of identity and class through Monty’s internal struggle to reconcile his lower-class upbringing with his newfound aristocratic ambitions. These subplots intertwine seamlessly with the main plot, offering a layered exploration of love, ambition, and societal expectations, while maintaining the play’s lighthearted and satirical tone.

Climax and Resolution

The climax of A Gentleman’s Guide to Love and Murder unfolds as Monty Navarro faces his greatest challenge: ensuring his inheritance while maintaining his dual identities and avoiding detection. In a tense confrontation, Monty must outwit his distant cousin, Hugo D’Ysquith, who unexpectedly returns and threatens to expose Monty’s schemes. This pivotal moment tests Monty’s wit, charm, and resolve, as he narrowly escapes discovery and solidifies his position as the rightful Earl. The resolution ties up loose ends, with Monty successfully claiming his title and reconciling his relationship with Phoebe, who accepts him for who he is. The play concludes on a humorous note, with Monty reflecting on the absurdity of his journey, leaving the audience with a sense of satisfaction and amusement at the clever, albeit murderous, path he took to achieve his goals.

Characters

A Gentleman’s Guide to Love and Murder features a dynamic cast of characters, including the charming yet murderous Monty Navarro, the D’Ysquith family members he targets, and the women in his life, Phoebe and Sibella, who complicate his ambitions. Miss Shingle, a mysterious figure from Monty’s past, adds depth to the narrative, while the ensemble of eccentric aristocrats showcases the play’s satirical take on class and social hierarchy.

Protagonist

The protagonist of A Gentleman’s Guide to Love and Murder is Monty Navarro, a charming, sophisticated, and ambitious young man who discovers he is eighth in line to the D’Ysquith earldom. Born out of wedlock, Monty is determined to rise above his humble beginnings and claim his rightful place among the aristocracy. His journey is marked by both witty humor and dark ruthlessness as he navigates a complex web of relationships and murder. Monty’s character is multi-dimensional, showcasing his struggle between his gentlemanly upbringing and his ruthless ambition. Throughout the play, Monty’s charm and wit are contrasted with his morally questionable actions, making him a compelling and intriguing character. His pursuit of love and social status drives the story, while his inner conflicts add depth to his persona. Monty’s ability to balance humor and tragedy makes him a standout protagonist in this musical comedy.

Antagonists

The primary antagonist of A Gentleman’s Guide to Love and Murder is the D’Ysquith family, who stand in the way of Monty Navarro’s inheritance. Lord Adalbert D’Ysquith, the current earl, represents the pinnacle of the family’s arrogance and entitlement, embodying the oppressive class system Monty seeks to infiltrate. Each member of the D’Ysquith family is uniquely eccentric and self-absorbed, creating a collective obstacle for Monty as he plots their demise. Their refusal to acknowledge Monty’s rightful place in the family tree fuels his ambition and justifies his morally questionable actions. Additionally, Monty’s own darker impulses and inner conflict serve as a form of self-antagonism, as he grapples with balancing his gentlemanly ideals with his ruthless desires. The D’Ysquiths’ comically exaggerated flaws and Monty’s internal struggles create a dynamic interplay of opposition, driving the play’s darkly humorous narrative forward.

Supporting Characters

The supporting characters in A Gentleman’s Guide to Love and Murder add depth and humor to the story, each playing a crucial role in Monty Navarro’s journey. Phoebe D’Ysquith, Monty’s cousin and love interest, is a kind-hearted and naive young woman who represents a genuine connection for Monty amidst his scheming. Her innocence contrasts with the darker undertones of the plot, making her a sympathetic figure. On the other hand, Sibella Hallward, Monty’s shallow and manipulative fiancée, embodies his desire for social status and material comfort, highlighting his internal conflict between love and ambition.

The D’Ysquith family members, though antagonistic, are memorably eccentric and comedic, with each one’s exaggerated personality contributing to the play’s dark humor. Additionally, the actor portraying all the D’Ysquith siblings showcases impressive versatility, adding to the play’s theatrical charm. Together, these characters create a dynamic and engaging narrative that explores themes of love, class, and morality.

Themes and Motifs

The play explores themes of love, class, and identity, with dark humor and irony. Monty’s journey reflects the clash between ambition and morality, while the comedic motifs of mistaken identity and societal satire add layers to the narrative.

Love and Relationships

At the heart of A Gentleman’s Guide to Love and Murder lies a complex exploration of love and relationships, interwoven with dark humor. Monty Navarro’s romantic interests, particularly his affection for Sibella Hallward and Phoebe D’Ysquith, drive the plot’s emotional core. Sibella, representing high society and superficial allure, contrasts sharply with Phoebe, who embodies genuine connection and depth. Their differing personalities and Monty’s shifting affections highlight the tension between desire and true love. The musical cleverly uses these relationships to explore themes of class and ambition, as Monty’s pursuit of love becomes entangled with his quest for social status. The comedic yet poignant portrayal of these relationships underscores the play’s satirical take on societal norms, making love both a catalyst for chaos and a source of redemption in Monty’s journey.

Class and Social Status

A Gentleman’s Guide to Love and Murder keenly satirizes the British class system, using Monty Navarro’s ascent through the aristocracy as a lens to critique social hierarchies. The D’Ysquith family embodies the upper echelon of society, with their wealth, titles, and pretentiousness serving as targets for the play’s humor. Monty’s journey from obscurity to earldom highlights the absurdity of societal expectations tied to class, as he navigates a world where lineage and wealth dictate value. The play mocks the superficiality of high society, portraying its members as both comically eccentric and morally bankrupt. Meanwhile, Monty’s low-born origins contrast sharply with his ambitions, illustrating the tension between merit and birthright. Through its witty dialogue and over-the-top characters, the musical cleverly exposes the flaws in the class system, suggesting that true worth is not determined by one’s pedigree. This commentary on social status remains a central theme, adding depth to the play’s darkly comedic narrative.

kinetic and potential energy worksheet pdf

Kinetic energy is the energy of motion, while potential energy is stored energy due to position or configuration. Both forms are fundamental in understanding energy transformations and mechanical systems.

1.1 What is Kinetic Energy?

Kinetic energy is the energy an object possesses due to its motion. It depends on the object’s mass and velocity, following the formula KE = ½mv². The greater the mass or speed, the higher the kinetic energy. Examples include a rolling ball, a flying bird, or a moving car. This energy is transferable and can transform into other forms, such as heat or sound, when motion changes. Kinetic energy is a fundamental concept in physics, illustrating how motion contributes to an object’s energy state.

1.2 What is Potential Energy?

Potential energy is the stored energy an object has due to its position or configuration. It is calculated using the formula PE = mgh, where mass, gravity, and height determine its value. This energy remains dormant until the object moves or changes its state. Examples include water stored behind a dam or a compressed spring. Potential energy highlights how position and force contribute to an object’s energy state, often transforming into kinetic energy when released. It is a crucial concept in understanding energy conservation and mechanical systems.

1.3 Key Differences Between Kinetic and Potential Energy

Kinetic energy is associated with motion, while potential energy is stored energy due to position or state. Kinetic energy depends on mass and velocity, calculated as KE = ½mv², whereas potential energy relies on mass, gravity, and height, expressed as PE = mgh. Kinetic energy is active and visible, like a rolling ball, while potential energy is latent, such as water stored at a height. The key distinction lies in their states: kinetic energy is energy in action, while potential energy is energy waiting to be unleashed. Both are integral to understanding energy transformations and conservation.

Formulas and Calculations

KE = ½mv² calculates kinetic energy, while PE = mgh determines potential energy. Total mechanical energy is the sum of both: ME = KE + PE. These formulas enable precise energy calculations.

2.1 Kinetic Energy Formula: KE = ½mv²

The kinetic energy formula, KE = ½mv², calculates the energy an object possesses due to its motion. Here, m represents mass in kilograms, and v is velocity in meters per second. Squaring the velocity emphasizes the significant impact of speed on kinetic energy. This formula is essential for understanding how motion contributes to an object’s energy. By plugging in the values, one can determine the kinetic energy of moving objects, such as rolling balls or flying projectiles, making it a fundamental tool in physics and engineering applications.

2.2 Potential Energy Formula: PE = mgh

The potential energy formula, PE = mgh, calculates stored energy due to an object’s height and mass. Here, m is mass in kilograms, g is the acceleration due to gravity (approximately 9.8 m/s²), and h is the height in meters. This formula applies to gravitational potential energy, showing how energy is stored when objects are elevated. For example, a baby carriage at the top of a hill has potential energy, which converts to kinetic energy as it rolls down. This concept is crucial in understanding energy conservation and transformations in various systems.

2.3 Total Mechanical Energy: ME = KE + PE

The total mechanical energy of a system is the sum of its kinetic energy (KE) and potential energy (PE). The formula ME = KE + PE represents this relationship. Kinetic energy is associated with motion, while potential energy is stored energy due to position or configuration. For example, a rolling ball has both KE and PE if it is elevated. Calculating ME involves adding the two energies, ensuring a comprehensive understanding of the system’s energy state. This concept is vital in analyzing energy conservation and transformations in mechanical systems, where energy shifts between kinetic and potential forms but remains conserved.

Practice Problems and Examples

Practice problems involve classifying energy types, calculating KE and PE using formulas, and solving real-world scenarios, such as a moving car or elevated objects, to understand energy principles.

3.1 Classifying Energy Types (Kinetic or Potential)

Classify objects as having kinetic or potential energy. Examples include a rolling ball (kinetic) and a lifted book (potential). Worksheets provide exercises like identifying energy types in various scenarios, such as a moving car or a compressed spring, helping students understand energy forms and their applications. These activities enhance conceptual clarity and practical problem-solving skills, making energy concepts accessible and engaging for learners.

3.2 Calculating Kinetic Energy: Example Problems

Calculate the kinetic energy of a 2.1 kg volleyball moving at 30 m/s using the formula KE = ½mv². Substituting the values: KE = 0.5 * 2.1 * 30² = 0.5 * 2.1 * 900 = 945 J. This example demonstrates how to apply the kinetic energy formula to real-world scenarios. Worksheets provide similar exercises, such as finding the kinetic energy of a rolling car or a flying bird, helping students master energy calculations. These problems reinforce the understanding of motion and energy relationships.

3.3 Calculating Potential Energy: Example Problems

Potential energy is calculated using the formula PE = mgh, where m is mass, g is gravitational acceleration, and h is height. For example, a baby carriage with a mass of 12 kg at the top of a 21 m hill has PE = 12 * 9.8 * 21 = 2469.6 J. Worksheets often include problems like this, such as determining the potential energy of a roller coaster at the top of a slope or a book on a shelf. These exercises help students apply the formula to various scenarios, reinforcing their understanding of stored energy.

Real-World Applications

Kinetic and potential energy are crucial in energy conservation, renewable energy sources, and technological innovations, such as hybrid cars and hydroelectric power systems, enhancing efficiency and sustainability.

4.1 Energy Conservation

Energy conservation involves the efficient use and storage of kinetic and potential energy. By understanding these energy forms, systems can minimize waste and maximize output. For instance, hybrid vehicles store kinetic energy during braking (potential energy) and reuse it for acceleration, reducing fuel consumption. Similarly, hydroelectric power plants harness potential energy from water stored at heights to generate electricity, a renewable and sustainable practice. Such applications highlight the importance of energy conservation in balancing resource use and environmental protection, ensuring a greener future through smart energy management.

4.2 Renewable Energy Sources

Renewable energy sources harness kinetic and potential energy from natural systems. Solar energy captures kinetic energy from photons, while wind turbines convert kinetic energy from moving air into electricity. Hydroelectric power uses the potential energy of water stored at heights, released as it flows downward. Geothermal energy taps into the Earth’s internal heat, a form of potential energy. These sources emphasize sustainability, as they replenish naturally and reduce reliance on fossil fuels. Understanding kinetic and potential energy is crucial for designing efficient renewable energy technologies and promoting a cleaner, energy-efficient future.

4;3 Technological Innovations

Technological advancements leverage kinetic and potential energy to create innovative solutions. Flywheels store potential energy as kinetic energy when spun, aiding in energy storage systems. Regenerative braking in electric vehicles captures kinetic energy during deceleration, converting it into electrical energy. Smart grids optimize energy distribution by managing kinetic and potential energy flows. Robotics and wearable devices integrate energy harvesting, converting motion into usable power. These innovations highlight the practical applications of kinetic and potential energy principles, driving progress in energy efficiency and sustainability across various industries and daily life.

Worksheets and Resources

Download free PDF worksheets and Word documents for calculating kinetic and potential energy. Tools include problem sets, formulas, and examples for students and educators.

5.1 Free PDF Worksheets for Kinetic and Potential Energy

Download free PDF worksheets to practice calculating kinetic and potential energy. These resources include problem sets, formulas, and examples for both concepts. Ideal for students and educators, they cover classifying energy types, applying formulas, and solving real-world problems; Worksheets are available for download as PDF files, offering clear instructions and space for calculations. They are perfect for homework, classroom activities, or self-study. Many worksheets also include answer keys for easy verification. These tools are essential for mastering energy calculations and understanding mechanical systems.

5.2 Printable Worksheets for Classroom Use

Printable worksheets on kinetic and potential energy are designed for classroom use, offering structured activities and clear instructions. They include exercises for classifying energy types, applying formulas, and solving problems. These worksheets are ideal for group work or individual practice, helping students grasp key concepts. Many are formatted for easy printing and include space for calculations. Teachers can use them to reinforce lessons, assess understanding, and promote interactive learning. They are versatile tools for creating engaging and effective science lessons.

5.3 Online Tools for Energy Calculations

Online tools like interactive simulators and energy calculators simplify learning and problem-solving for kinetic and potential energy. Platforms such as PhET simulations and energy calculation apps provide visual representations of energy transformations. These tools allow users to input variables like mass, velocity, and height to calculate kinetic and potential energy in real-time. They also offer step-by-step solutions, making complex calculations more accessible. Educators can integrate these resources into lessons, while students can use them for self-study. These tools enhance understanding and provide immediate feedback, making energy concepts more engaging and easier to grasp.

Kinetic and potential energy are fundamental concepts in physics, essential for understanding energy transformations. This guide provides a comprehensive overview, from basics to practical applications.

For further learning, explore advanced resources, simulations, and real-world examples to deepen your understanding of energy principles and their role in various scientific and engineering fields.

6.1 Summary of Key Concepts

Kinetic energy (KE) is the energy of motion, calculated using the formula ( KE = rac{1}{2}mv^2 ), where ( m ) is mass and ( v ) is velocity. Potential energy (PE) is stored energy, often gravitational, calculated as ( PE = mgh ), where ( m ) is mass, ( g ) is gravity, and ( h ) is height. The total mechanical energy in a system is the sum of KE and PE. These concepts are crucial for understanding energy transformations and conservation. Real-world applications include renewable energy systems and technological innovations. Mastering these principles is essential for advanced studies in physics and engineering.

6.2 Additional Resources for Advanced Study

For deeper exploration, consider advanced physics textbooks like “University Physics” or online courses on Coursera and edX. Research papers on energy transformations and mechanical systems provide cutting-edge insights. Utilize simulation tools like PhET Interactive Simulations to visualize energy dynamics. Join forums like Physics Stack Exchange for discussions and problem-solving. Explore journals such as the American Journal of Physics for in-depth articles. These resources enhance understanding and application of kinetic and potential energy in complex systems, preparing learners for specialized fields in engineering and physics.

6.3 Encouragement to Explore Energy Transformations

Exploring energy transformations fosters a deeper understanding of how kinetic and potential energy interact in real-world systems. By studying these concepts, learners can uncover the fascinating ways energy changes forms, from a roller coaster’s descent to a hydroelectric dam’s operation. This knowledge not only enhances problem-solving skills but also inspires innovation in fields like renewable energy and engineering. Encourage curiosity by engaging in hands-on experiments or simulations, such as building ramps or analyzing pendulums, to visualize energy transitions. Embrace the opportunity to apply these principles creatively, paving the way for a brighter, more sustainable future.

« Older posts